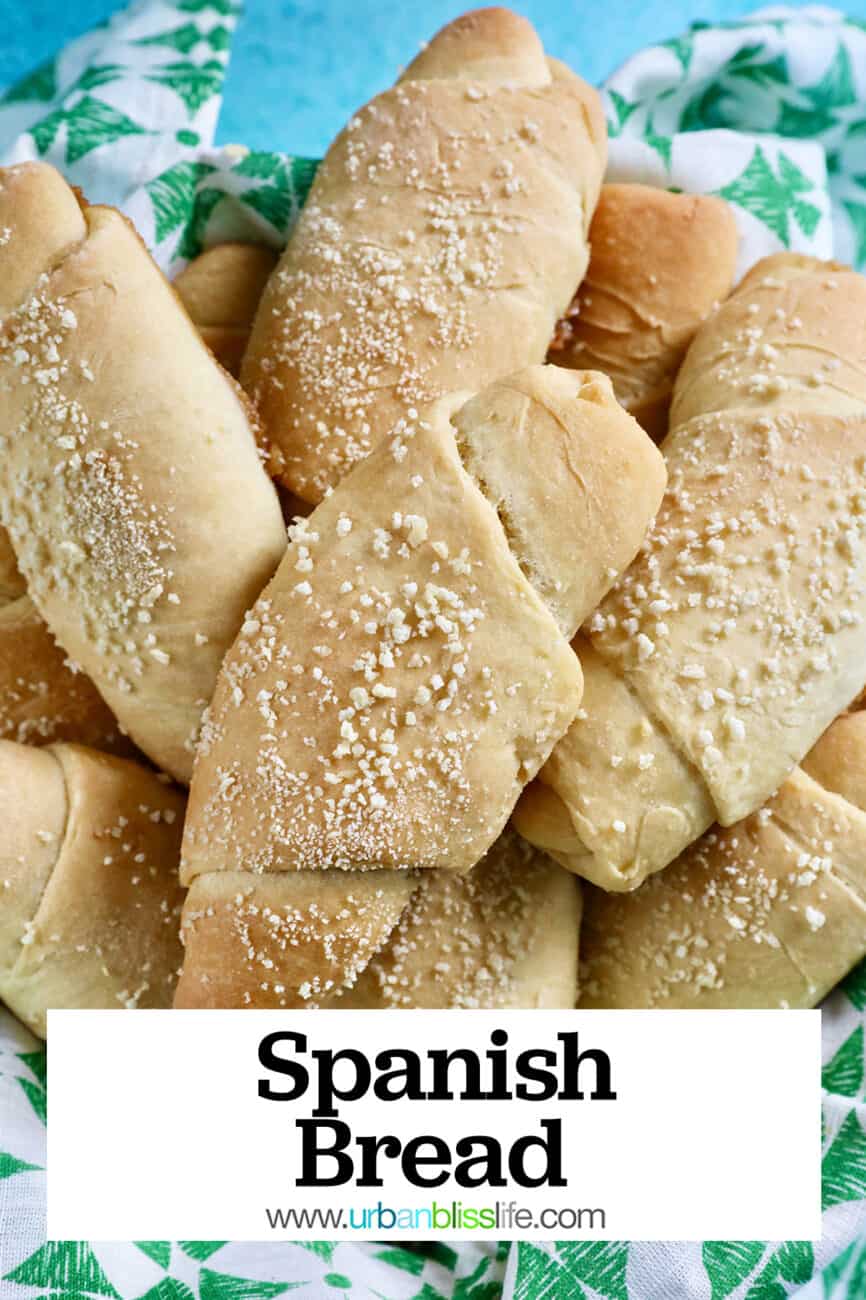
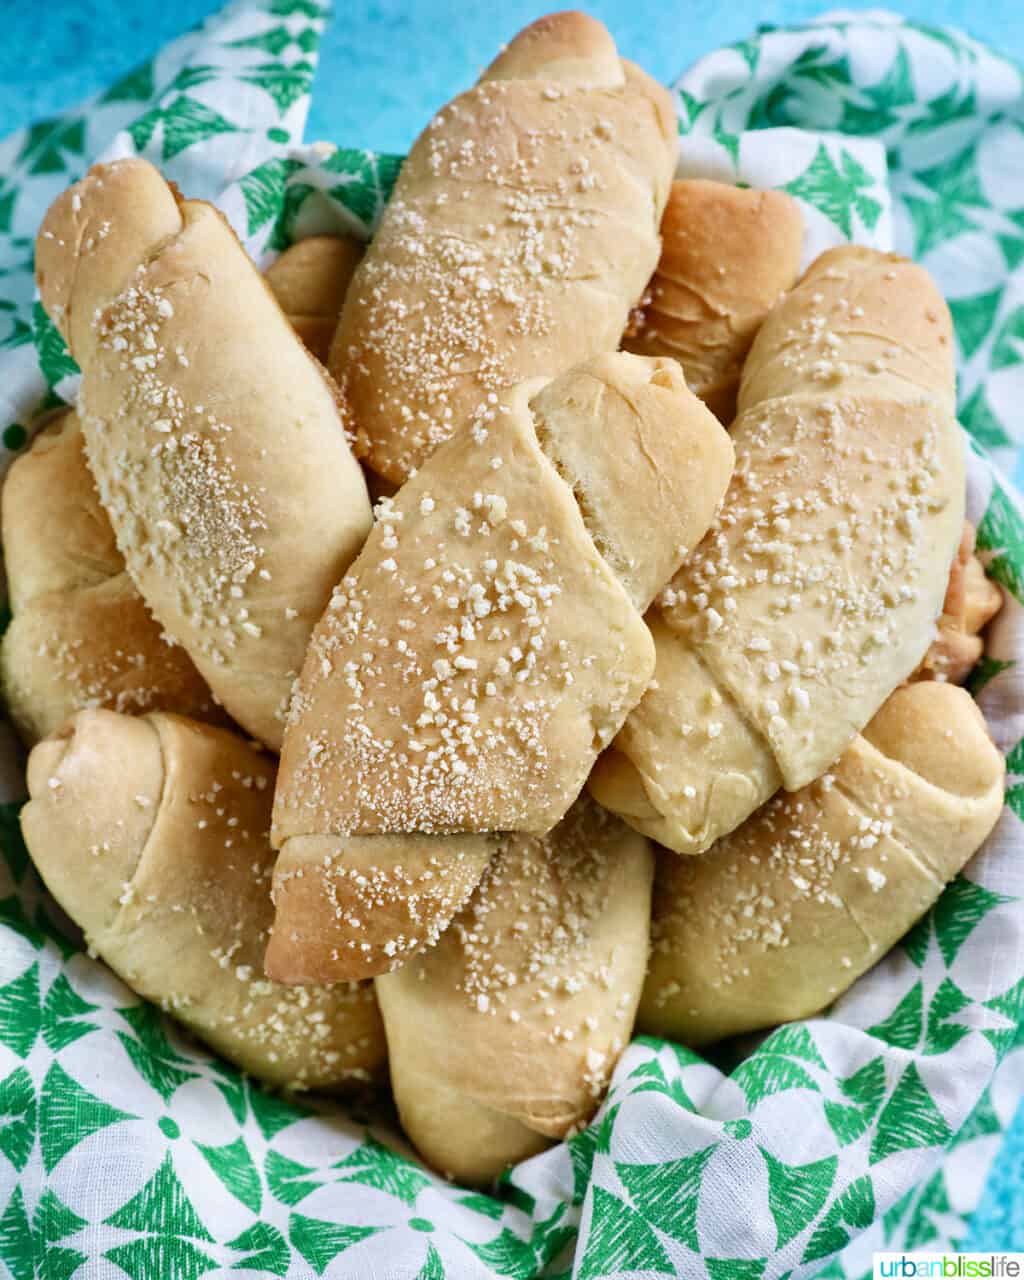
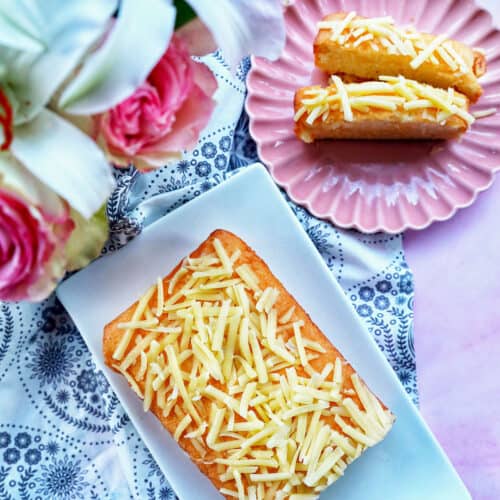
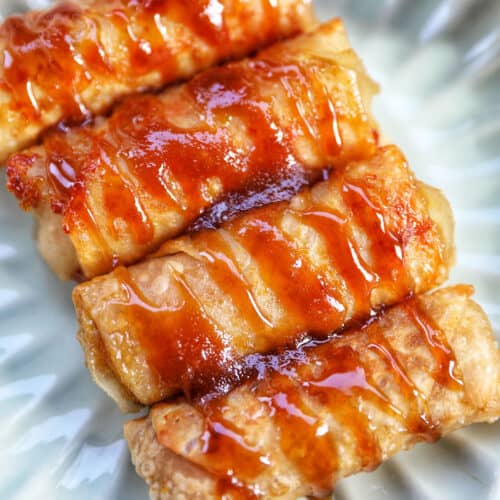
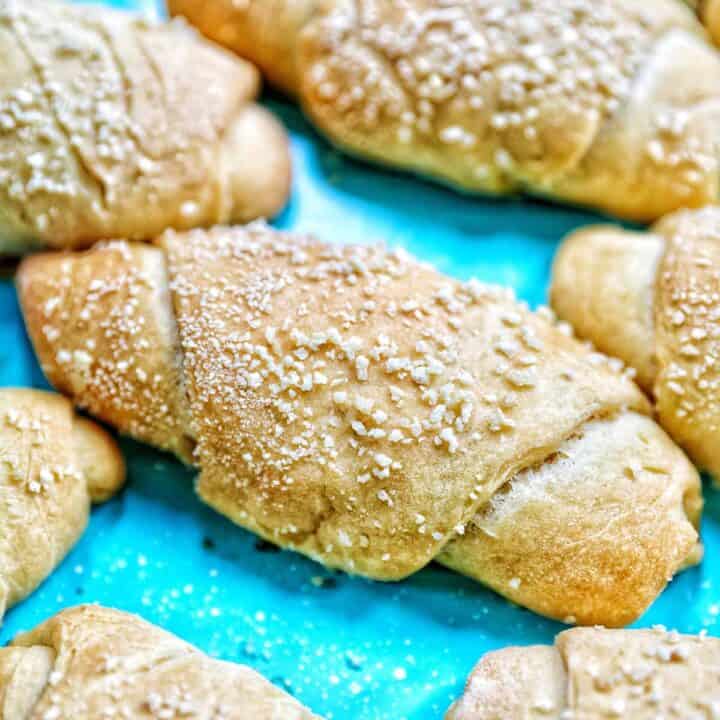
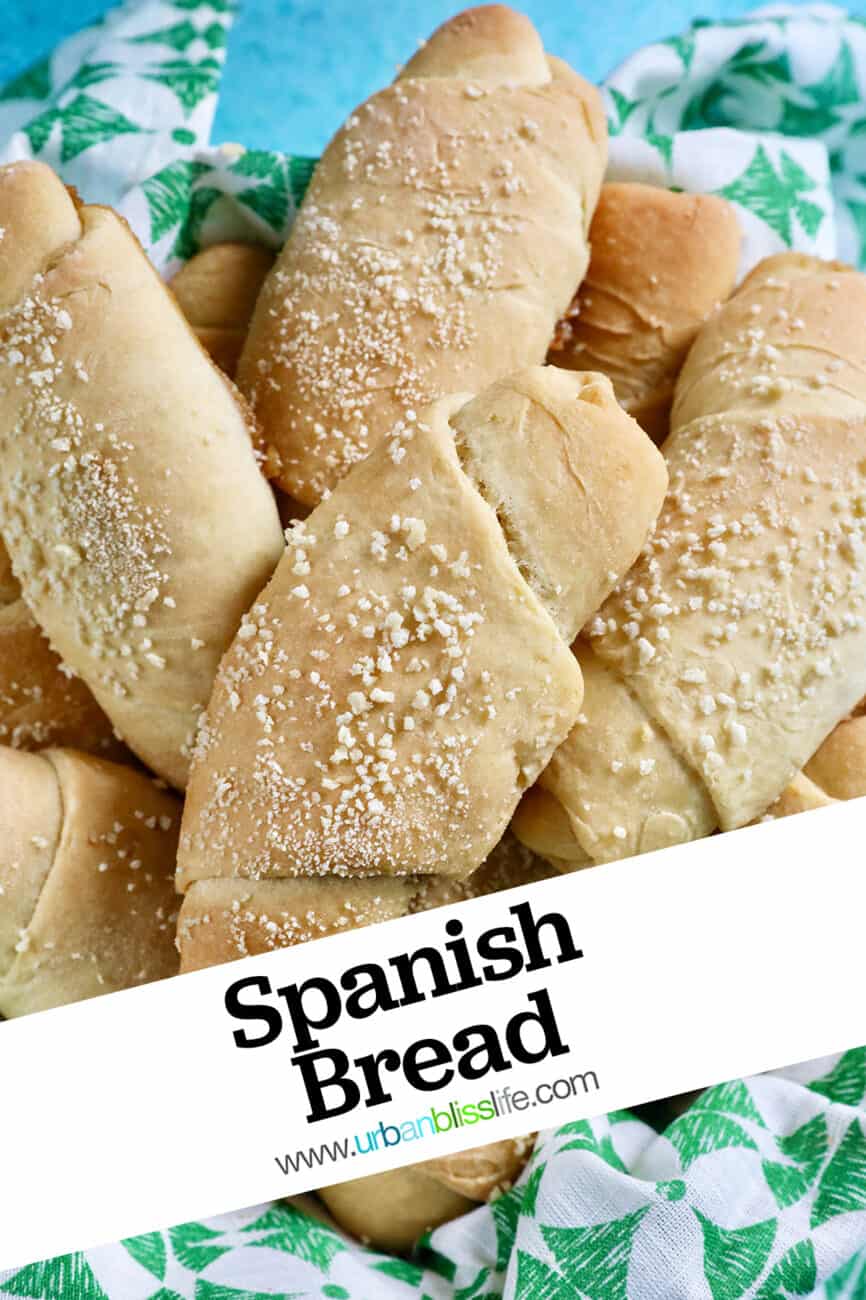
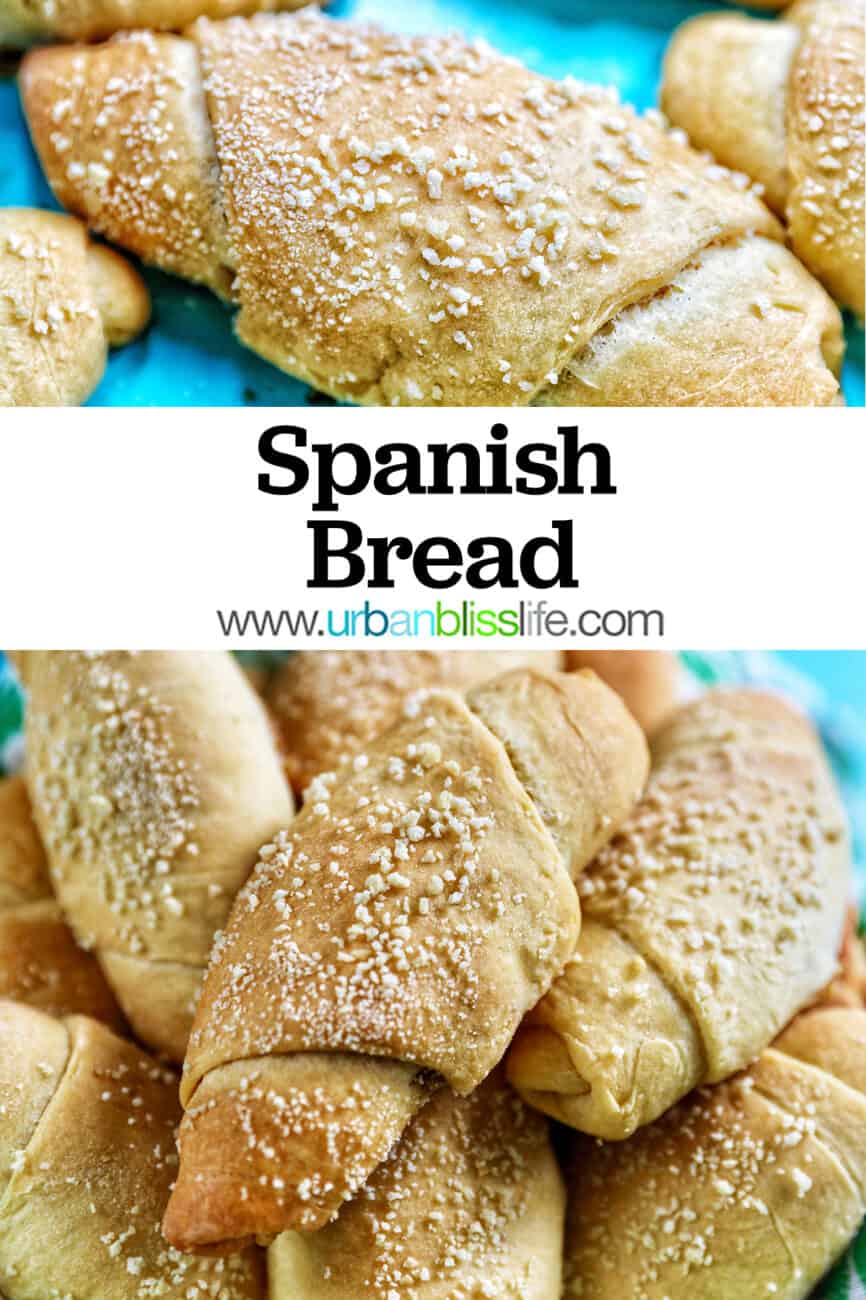
Spanish Bread is a popular Filipino soft bread roll that is often enjoyed for merienda – an afternoon snack. It’s made and filled with simple, inexpensive pantry ingredients, and baked until golden on the outside.
When you walk into a Filipino bakery, aromas of classic dough combined with sweetness fill the air. Like savory Filipino foods, many bread and pastry recipes lean toward the sweeter side.
Spanish bread is a traditional Filipino bread that you’ll find in most bakeries throughout the Philippines. You’ll find it with many variations of stuffing, but the dough recipe remains pretty consistent. My recipe uses a classic dough recipe and traditional bread-making methods. Then it’s stuffed with a classic butter-brown sugar filling. So good!
If you’re looking to make some classic Filipino rolls, try my easy Pandesal recipe.
Jump to:
🌟 Why you’ll love this recipe
This Filipino bread roll is very popular for good reason!
- The recipe calls for simple, inexpensive pantry ingredients that you probably already have on hand.
- Like most bread recipes, it takes time to proof and bake, but the actual hands-on active time is not long. And, the directions are very easy to follow.
- The outside is golden brown and the inside is soft, fluffy, and stuffed with an irresistible sweet filling.
- It’s the perfect mid-morning snack or mid-afternoon snack to enjoy with a cup of coffee.
🧈 Ingredient notes
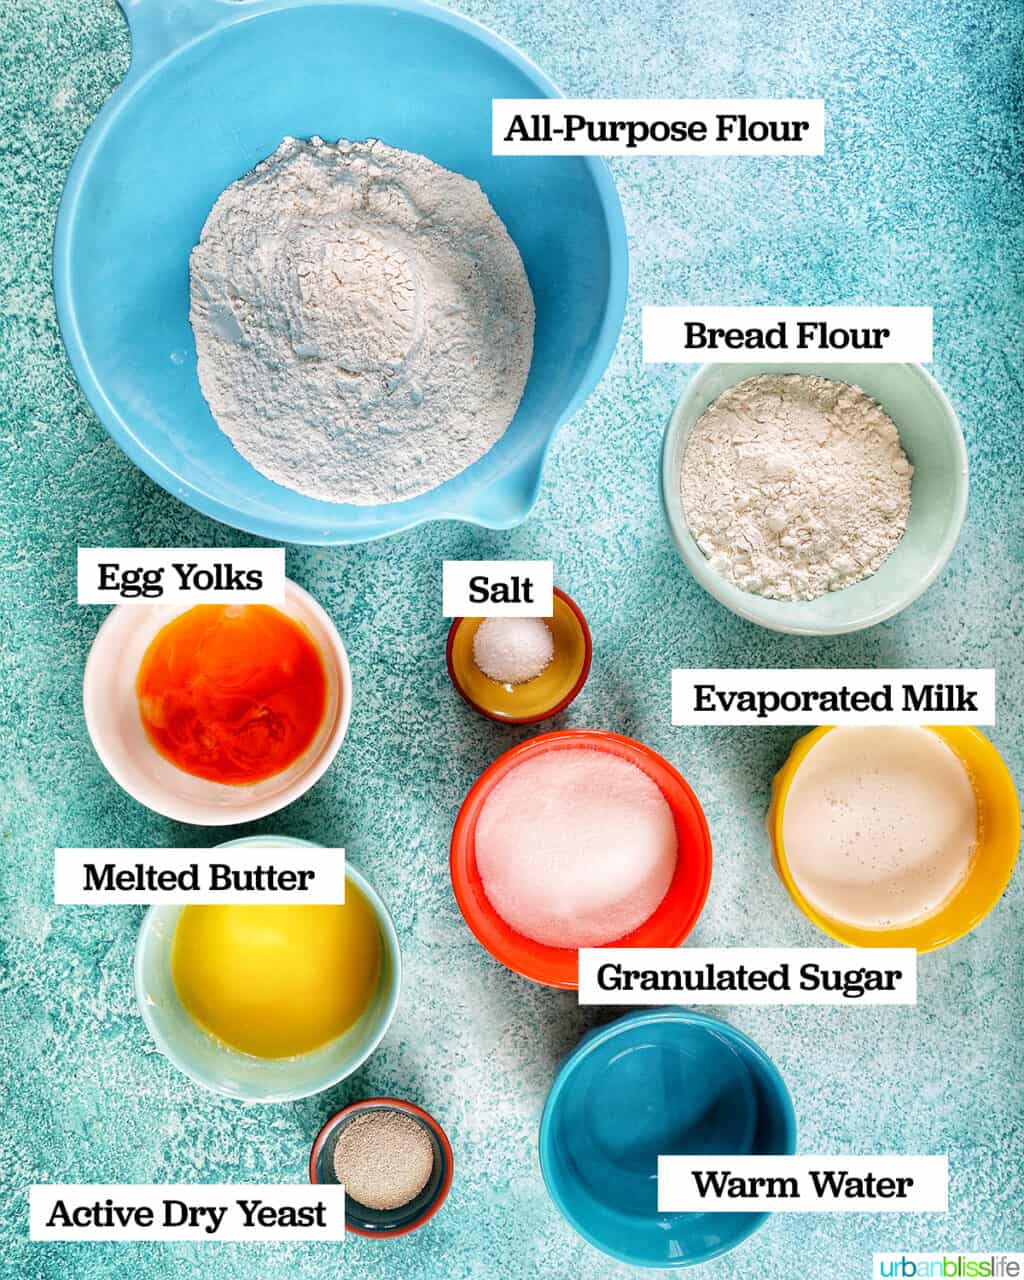
The above photo shows the ingredients you will need to make Spanish bread. Be sure to get the full measurements and directions in the recipe card near the bottom of this post.
A few notes:
Flour – My recipe calls for a mix of all-purpose flour and bread flour. I find that this blend gives Spanish bread a nice mix of the soft, fluffy AP flour and the structure of the bread flour. You can use all AP flour if you wish.
Active Yeast – Make sure you are using fresh active dry yeast. Yeast that has expired or is just past its prime, regardless of expiration date, will not rise as well during the activation period with the water. Therefore, the bread will not rise as well, either.
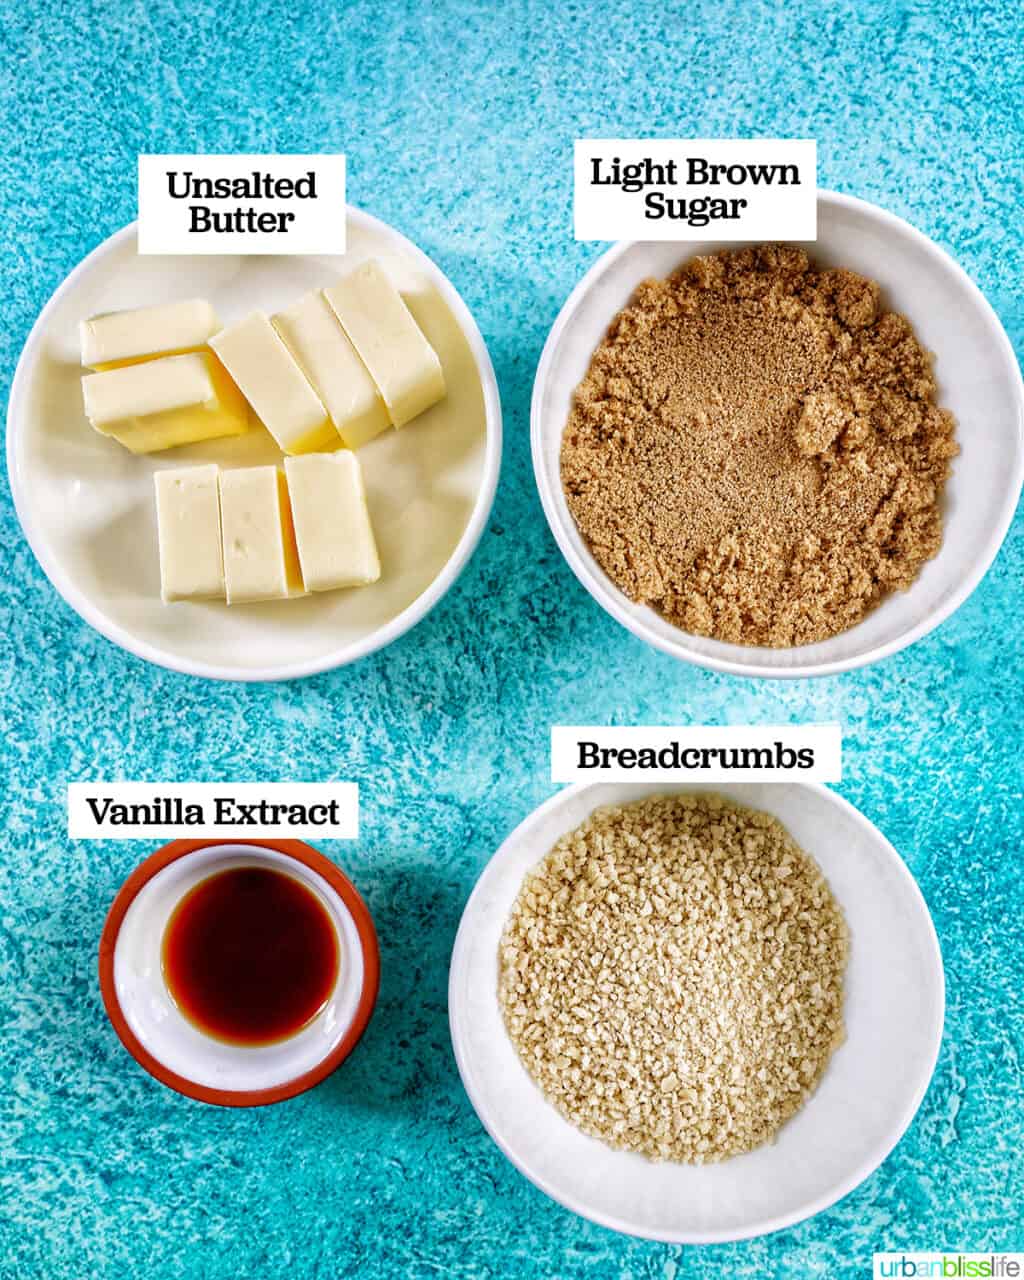
The photo above shows the ingredients for the filling. A few notes:
Breadcrumbs – You can use plain breadcrumbs, homemade breadcrumbs, or Panko breadcrumbs. If using Panko, I suggest placing the Panko breadcrumbs in a ziplock bag, then crushing or rolling with a rolling pin to make the crumbs smaller. This is a personal taste and texture preference, but if you want the larger crumbs that are usually associated with Panko, you can keep them as is.
Butter – Be sure to use unsalted butter that is softened to room temperature. This means, you can gently press down on the butter with a finger and it easily gives way to an indentation. Simply take the butter out of the refrigerator about 30 minutes before you start gathering the rest of the ingredients together and it should be softened by the time you are ready to make the filling.
✅ Step-by-step instructions
Exact measurements of ingredients and instructions are in the printable recipe card toward the bottom of this post. Here are some helpful tips to guide you as you make this recipe.
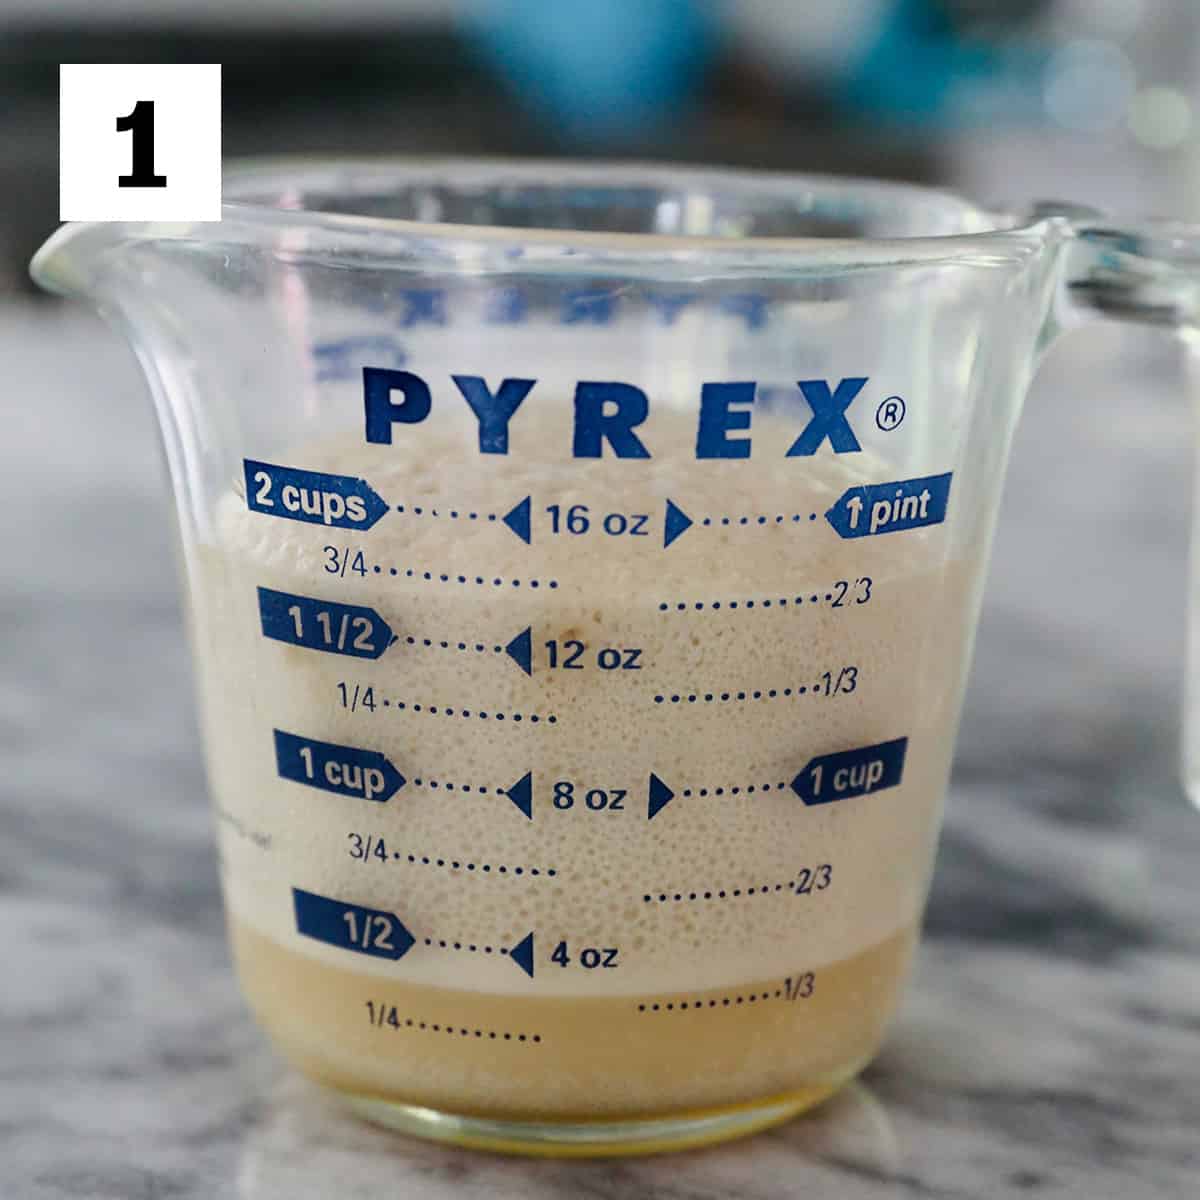
Proof the yeast
1. In a bowl or glass measuring cup, gently stir the yeast into the warm water. Let sit for 5 to 10 minutes, until the yeast almost doubles in size. Meanwhile, make the filling.
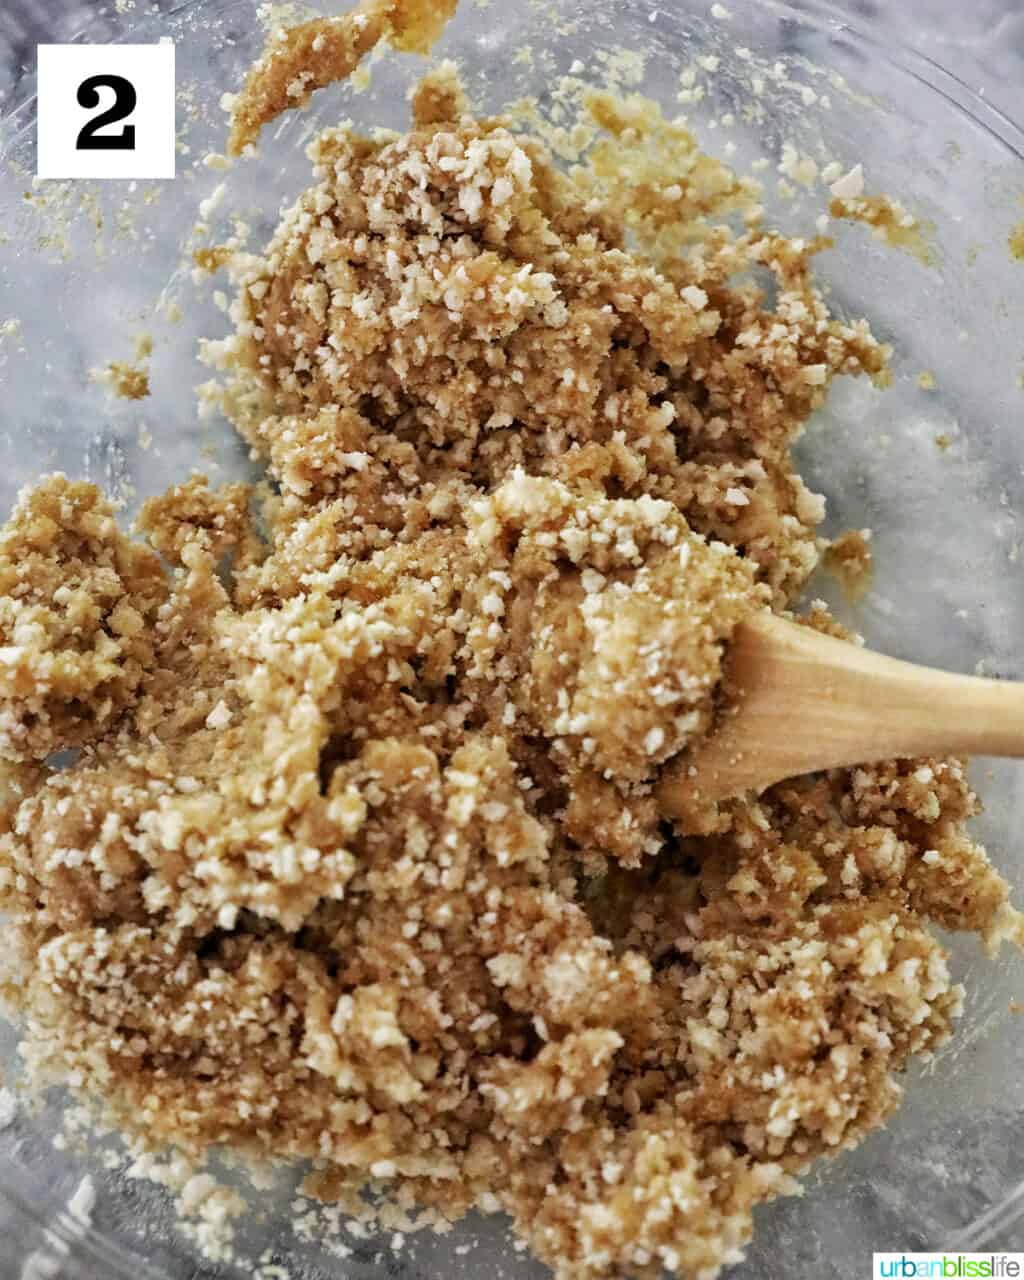
Make the filling
2. In a large bowl, mix together the softened butter, light brown sugar, ½ cup breadcrumbs, and vanilla. Set aside.
Make the bread
3. In a separate large bowl, whisk together the milk (or cream), granulated sugar, melted & cooled butter, egg yolks, salt, and yeast.
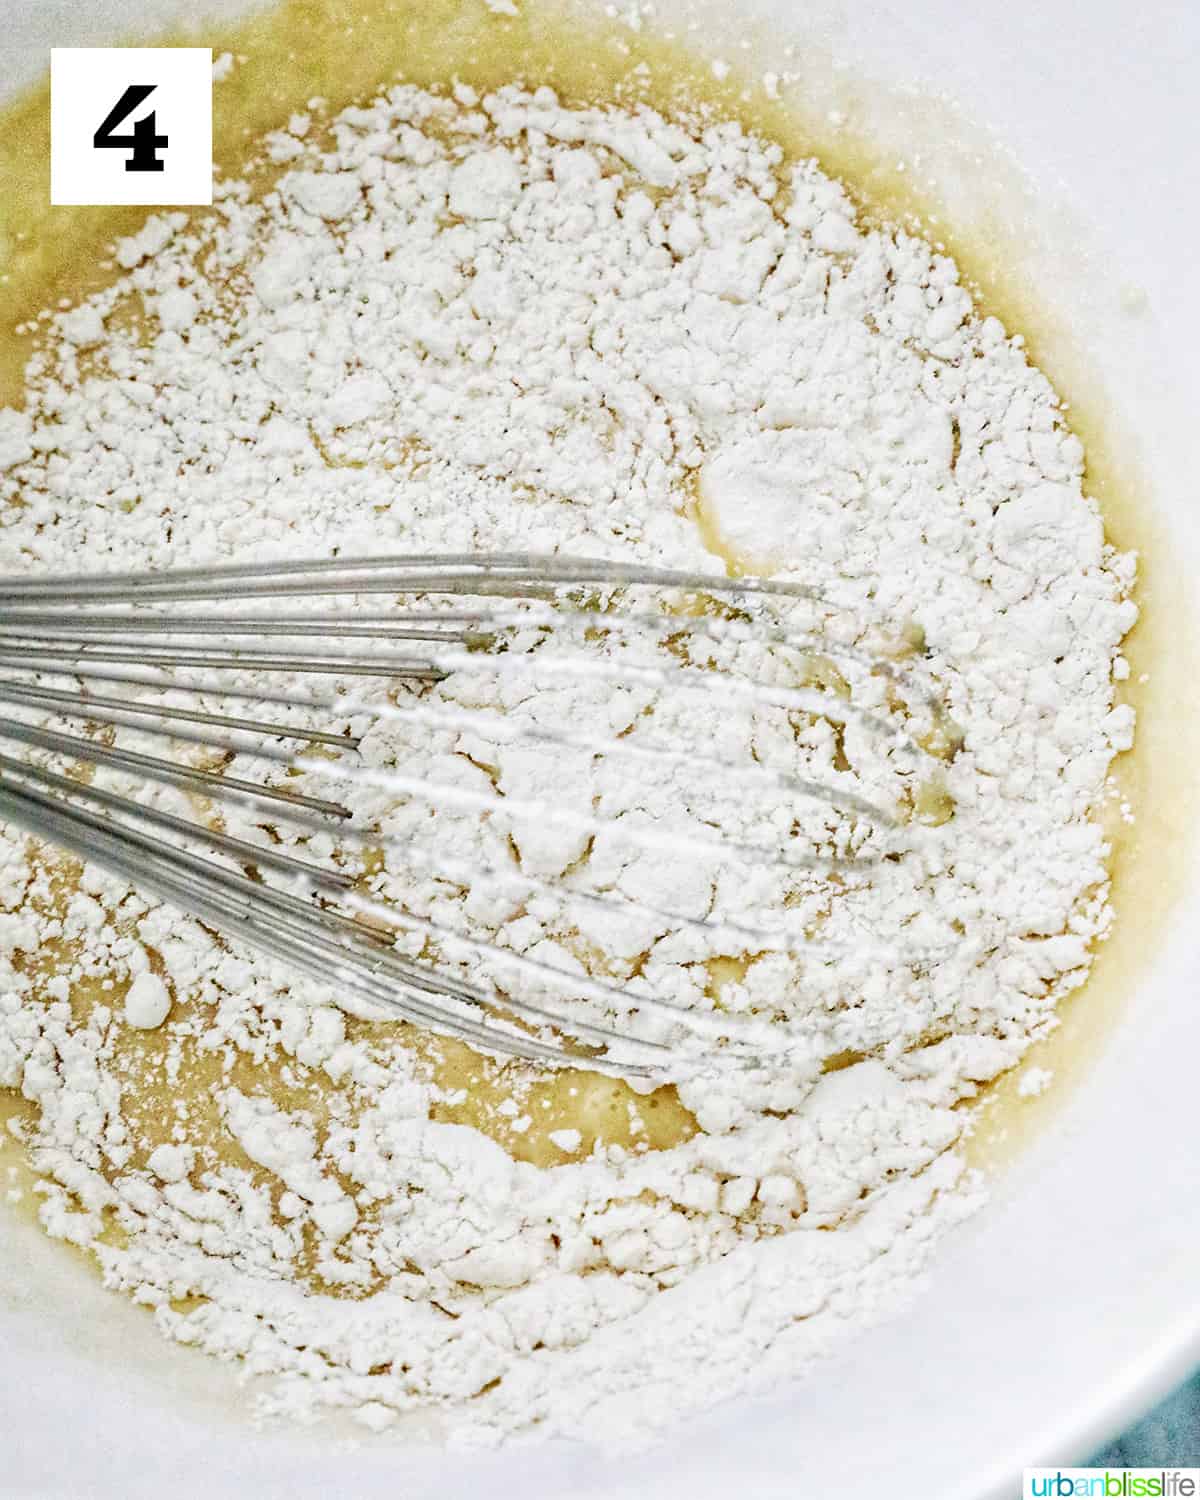
4. Gradually whisk in the flours, alternating between the bread flour and the all-purpose flour, until the mixture forms a dough ball.
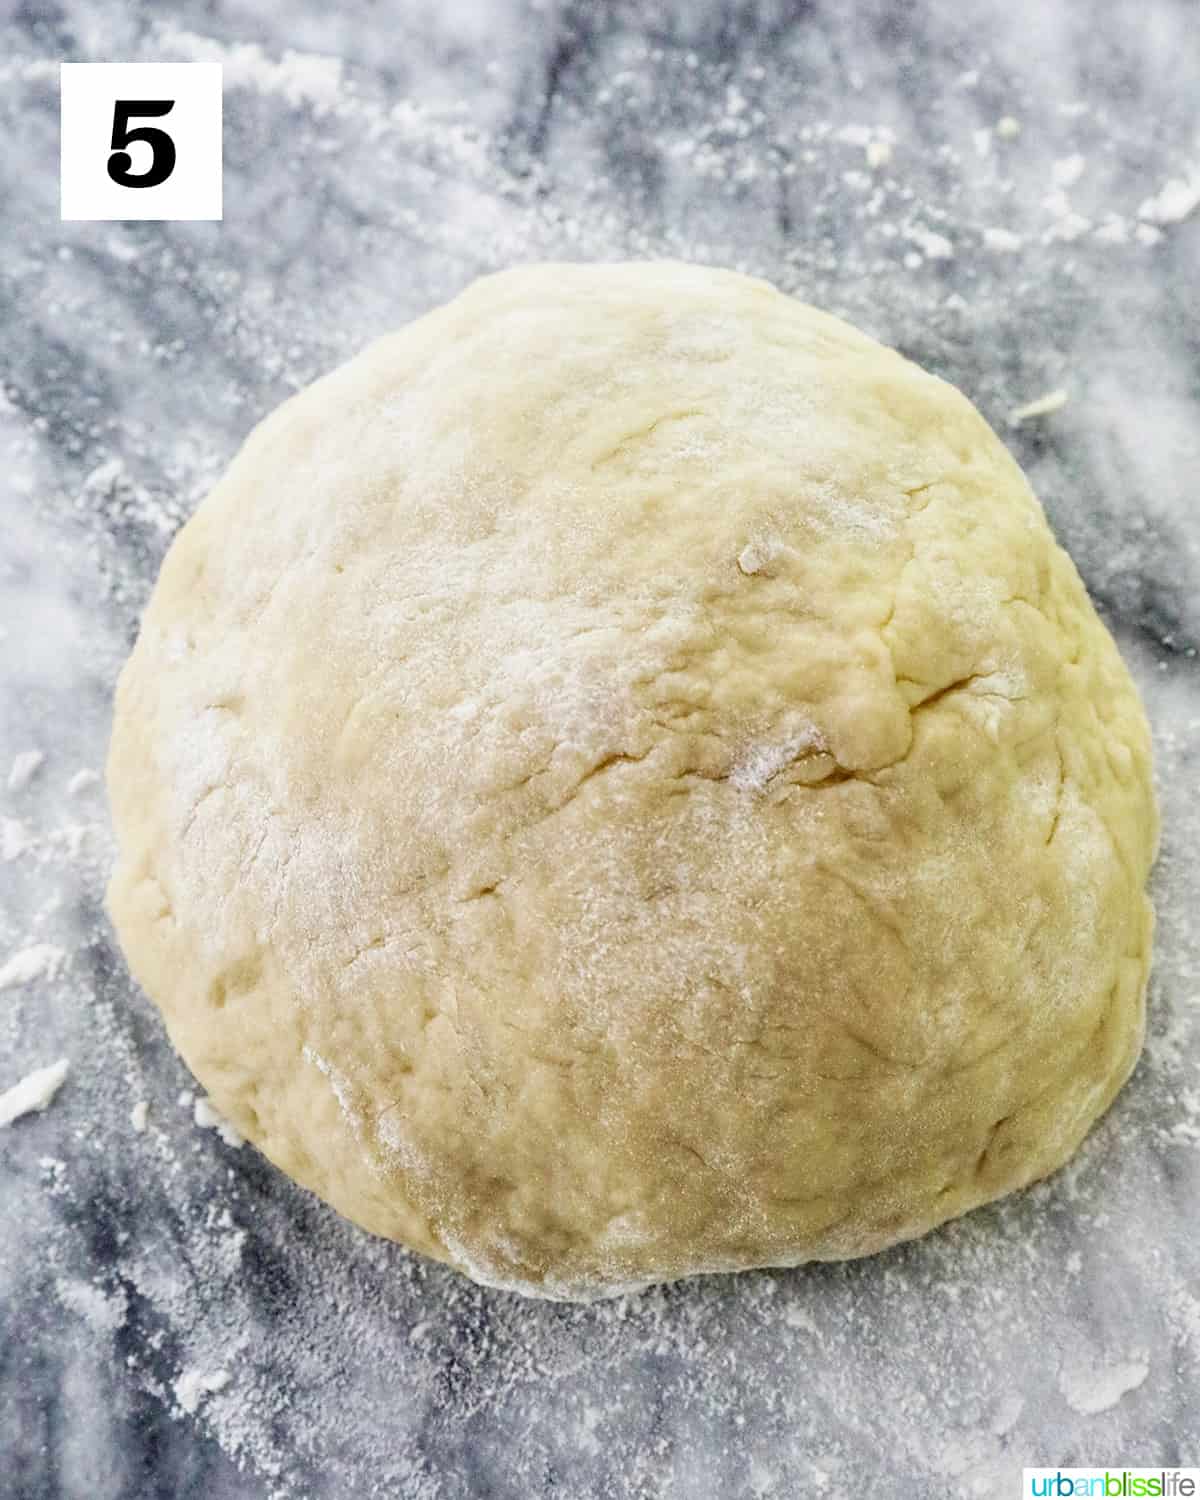
5. On a lightly floured surface, knead the dough for about 10 minutes, just until the dough becomes smooth and elastic. Lightly grease the inside of a large glass bowl with olive oil or butter and place the dough in the bowl.
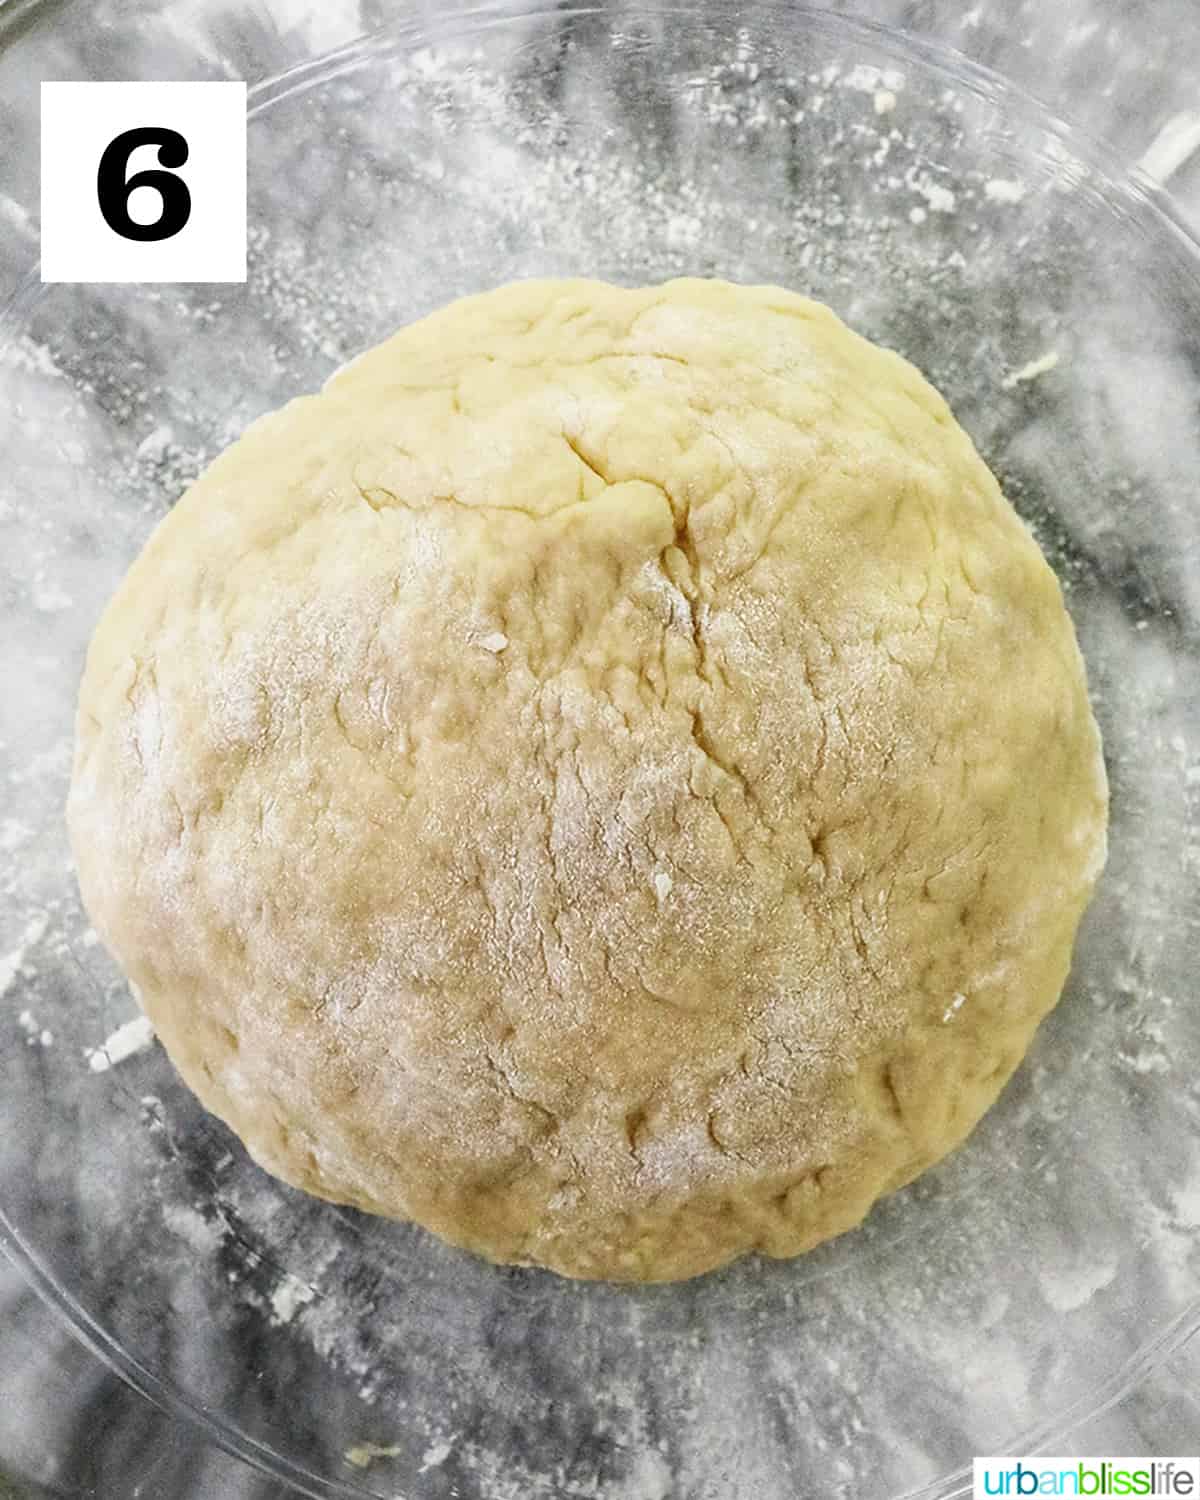
6. Cover with a towel or plastic wrap and allow to rise in a dark, warm place for about an hour. The dough should be double in size.

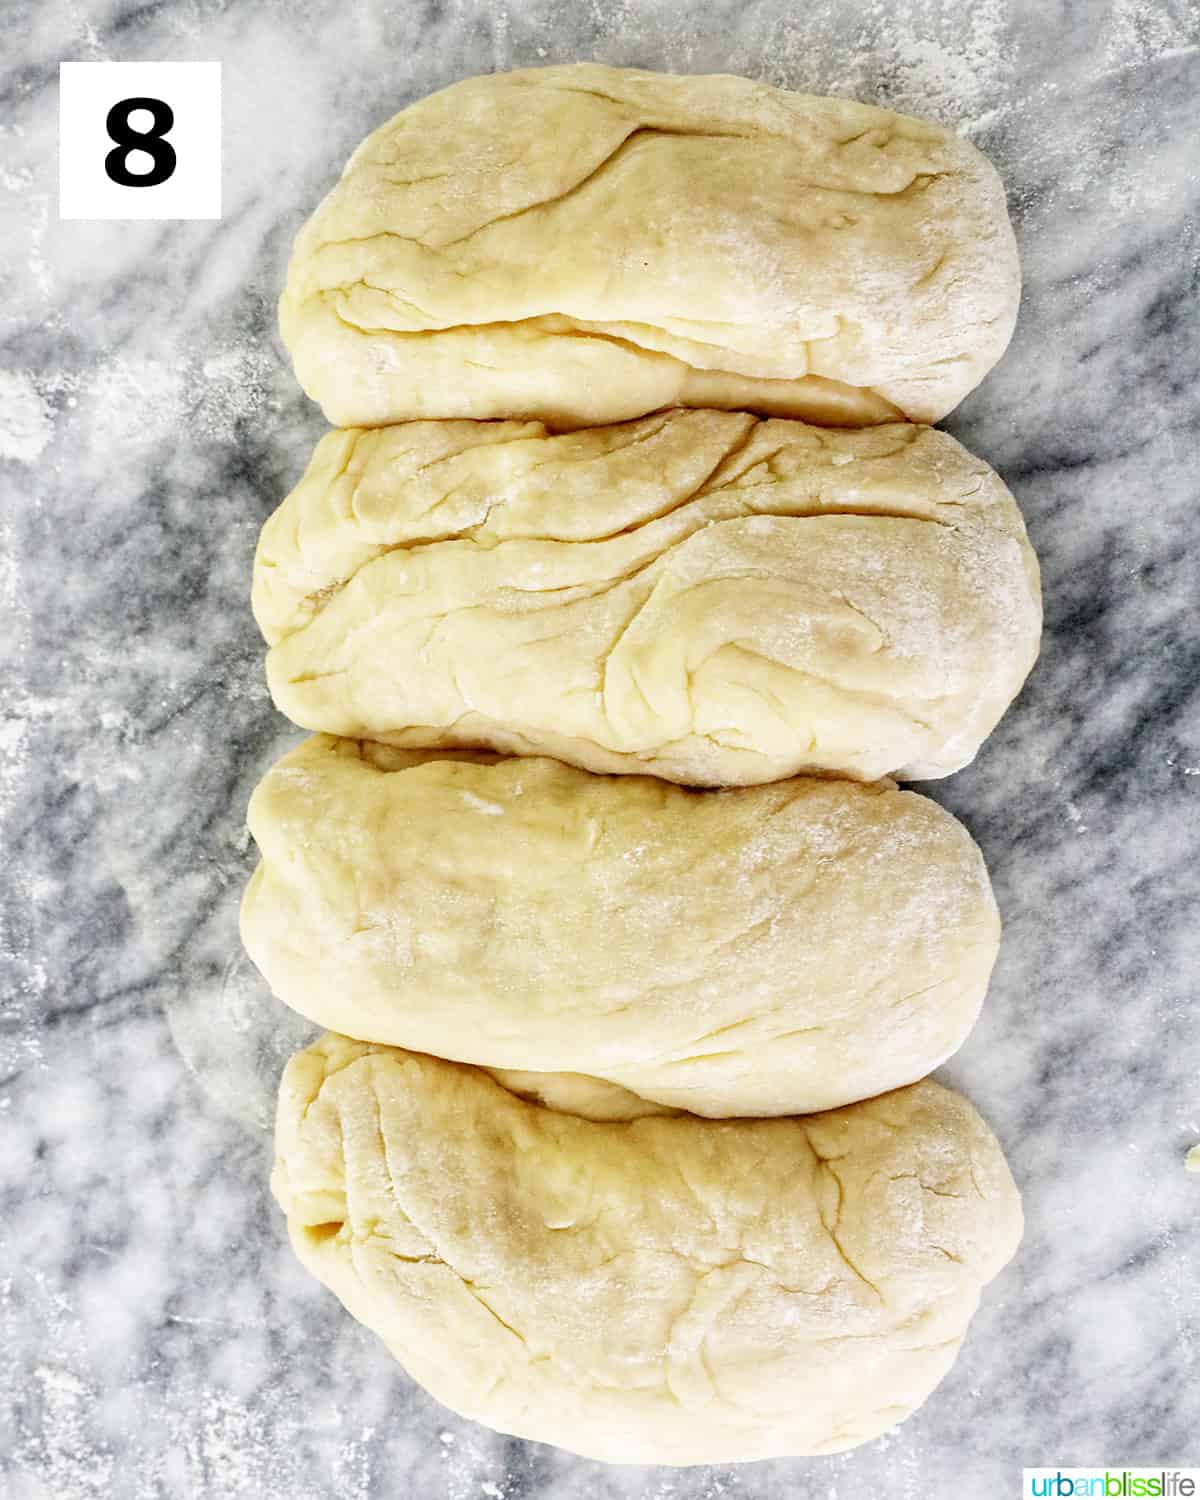
7. Return the dough to the floured surface, and divide into four even dough balls.
8. Then gently roll each ball out to form a log, about 6″ long by 2″ wide.
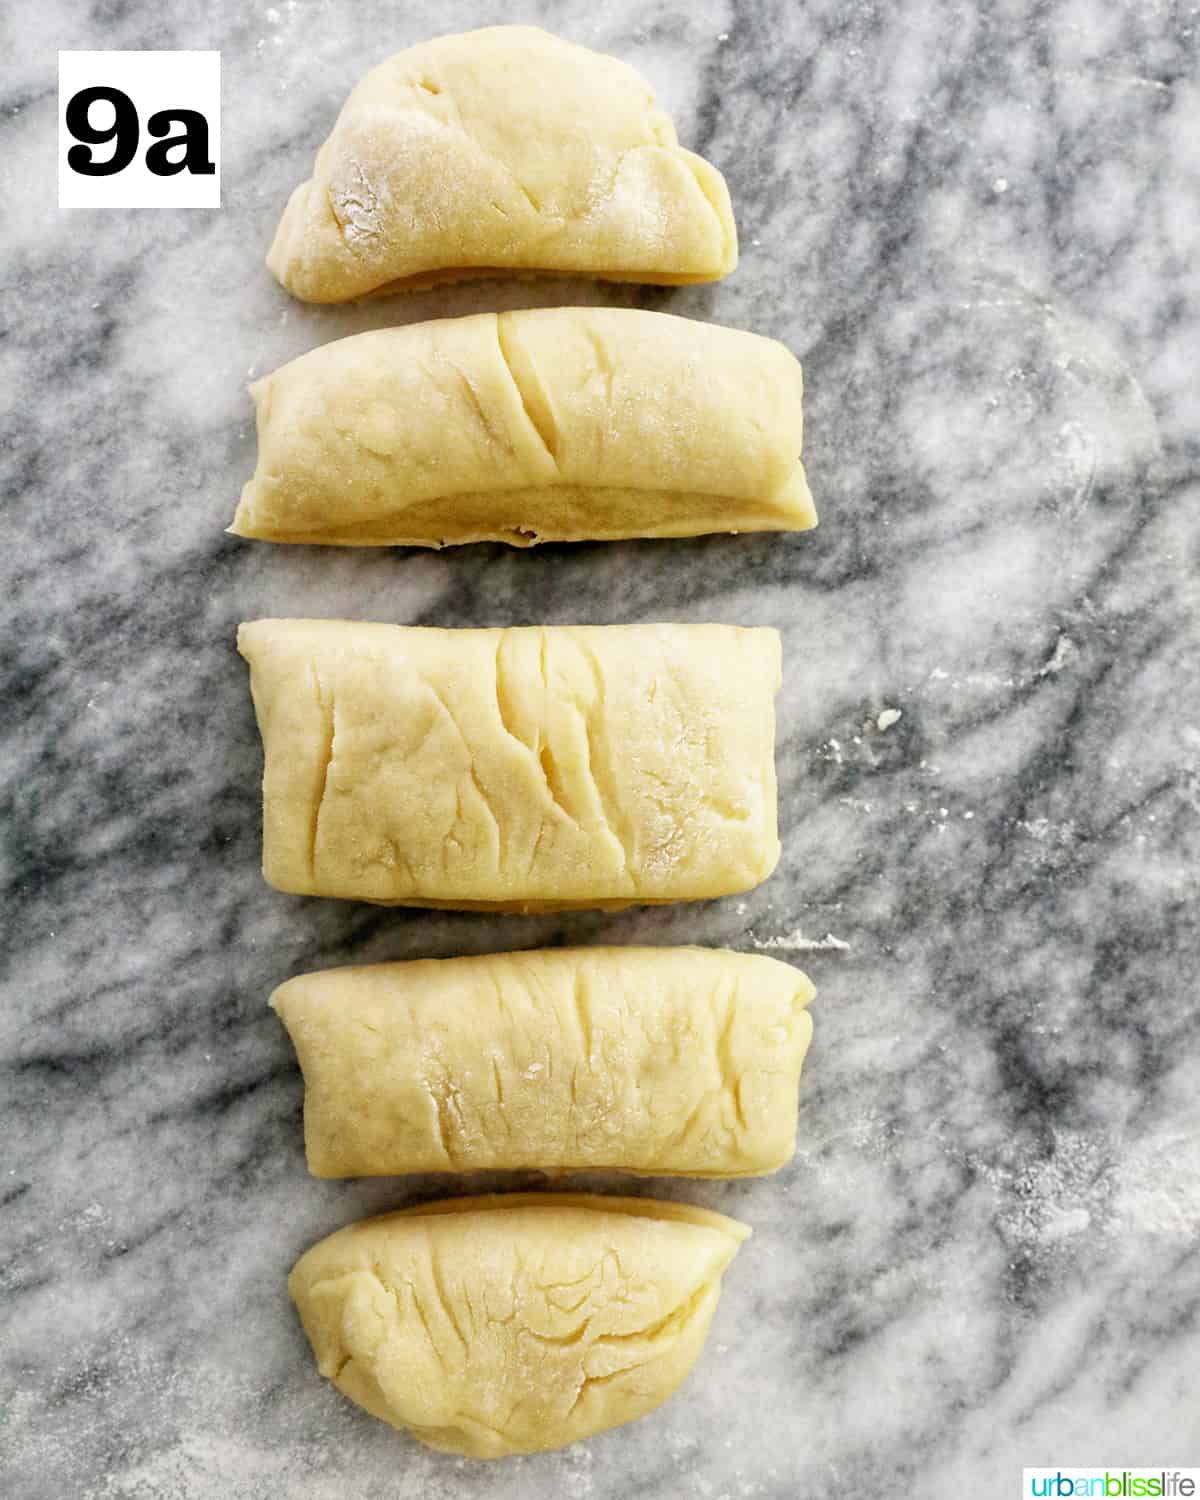
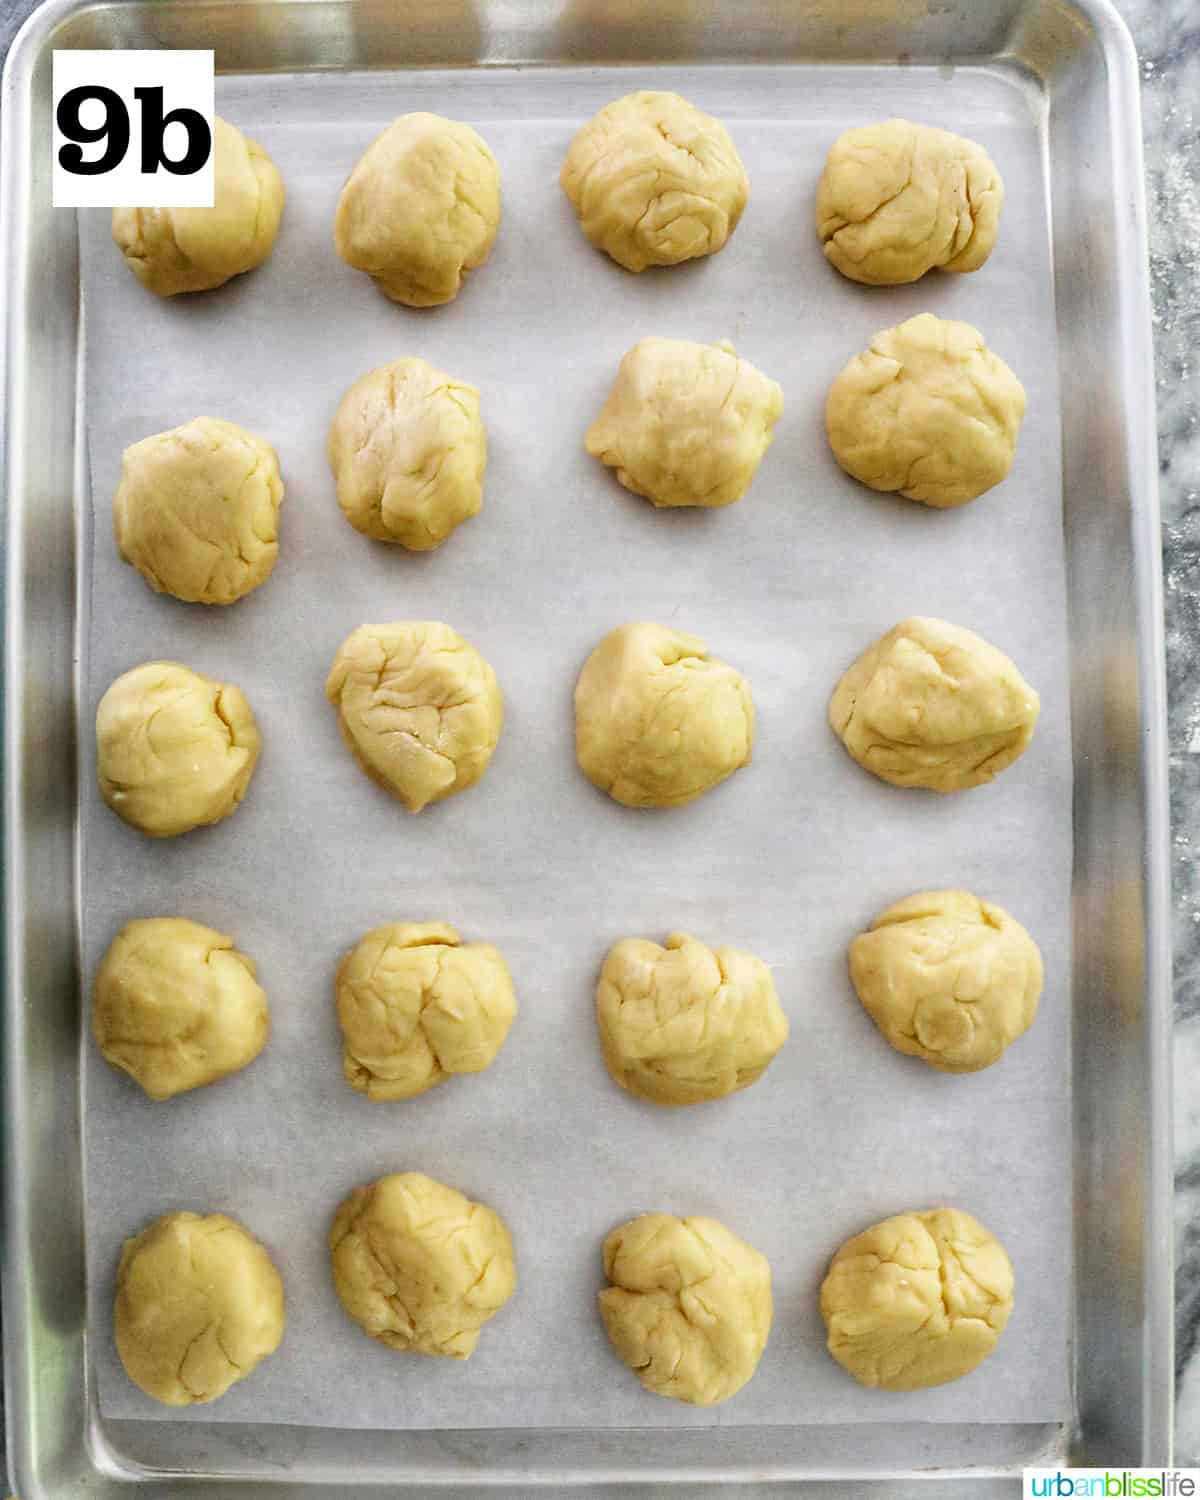
9. Use a pastry bench or pastry cutter to cut each log into 5 equal pieces and roll each into a ball (see Notes).
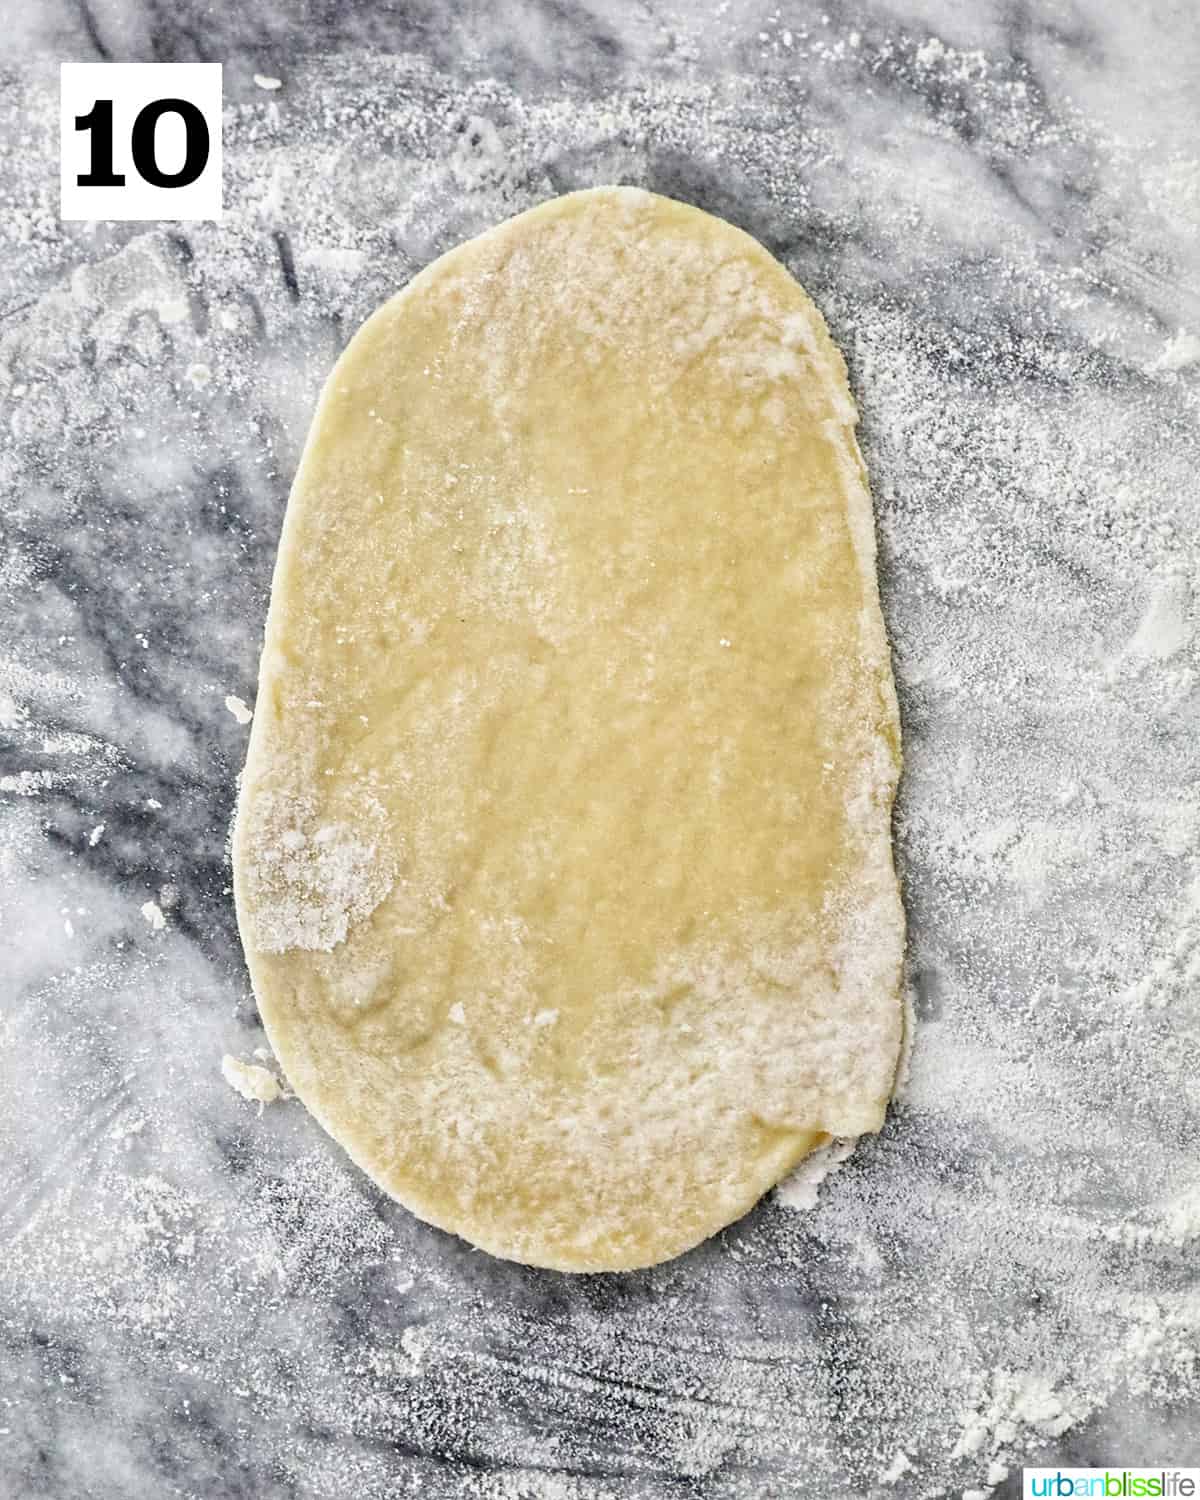
10. Use a rolling pin to roll each of those pieces flat into an oval shape about 6″ long by 3½” wide.
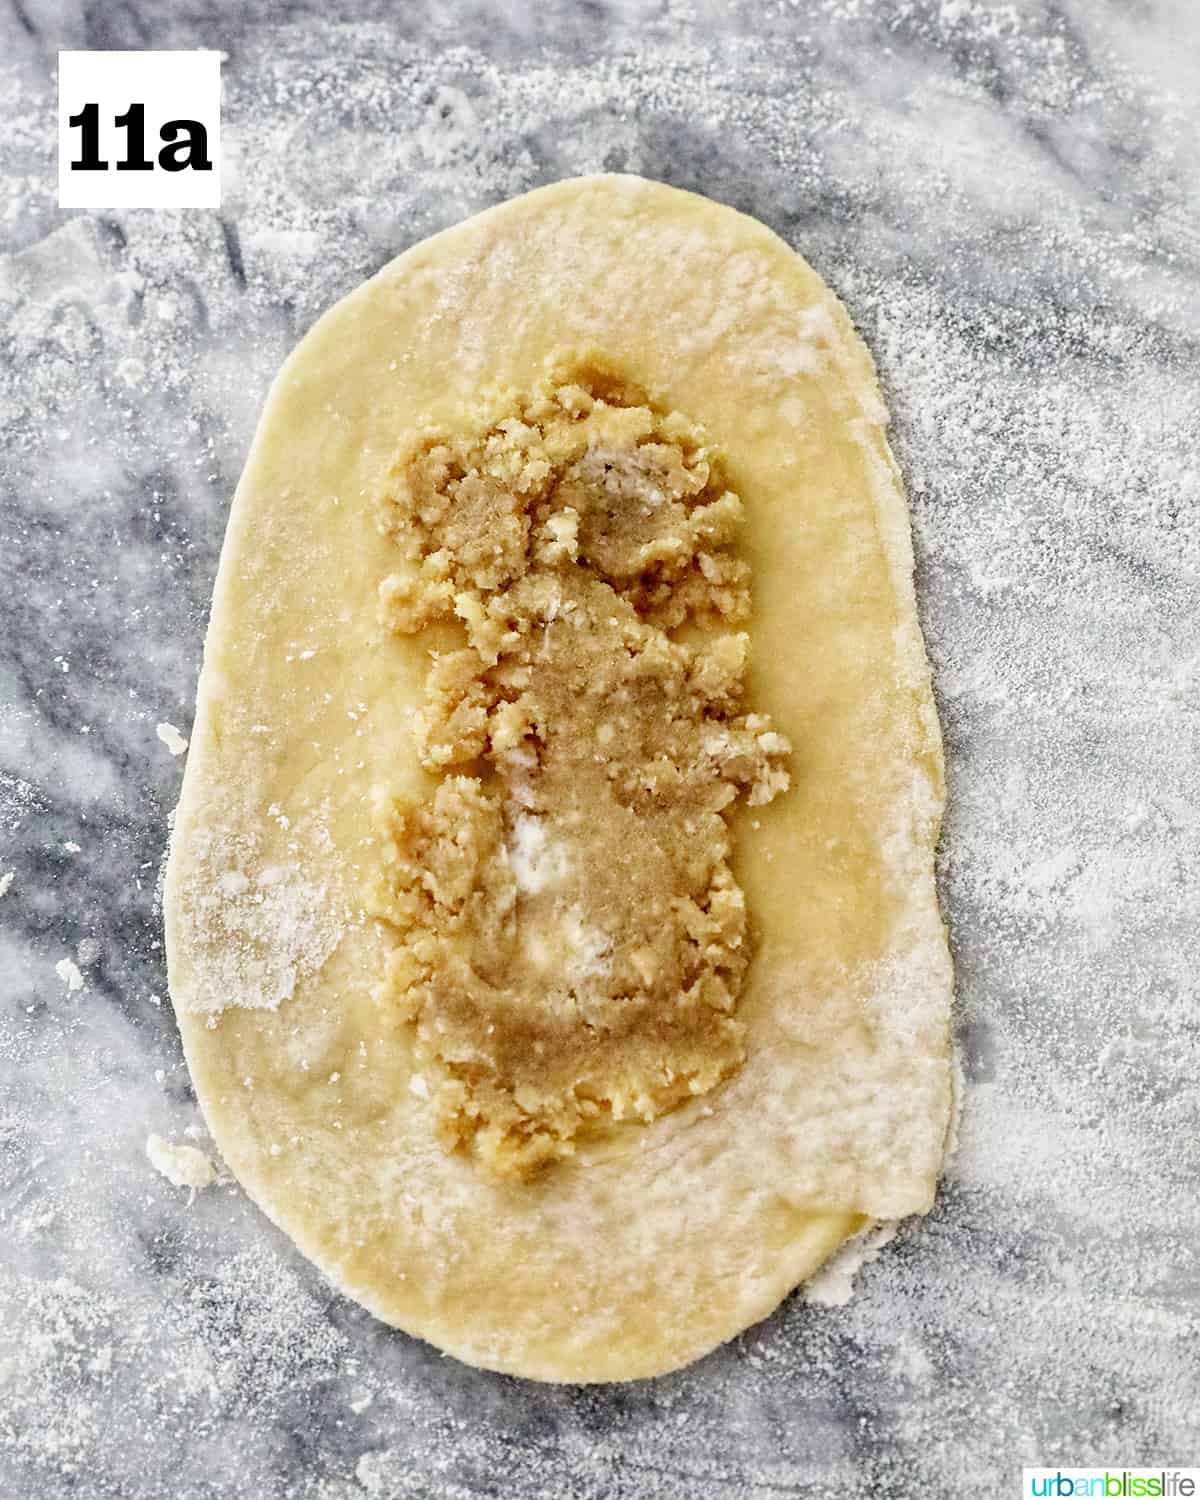
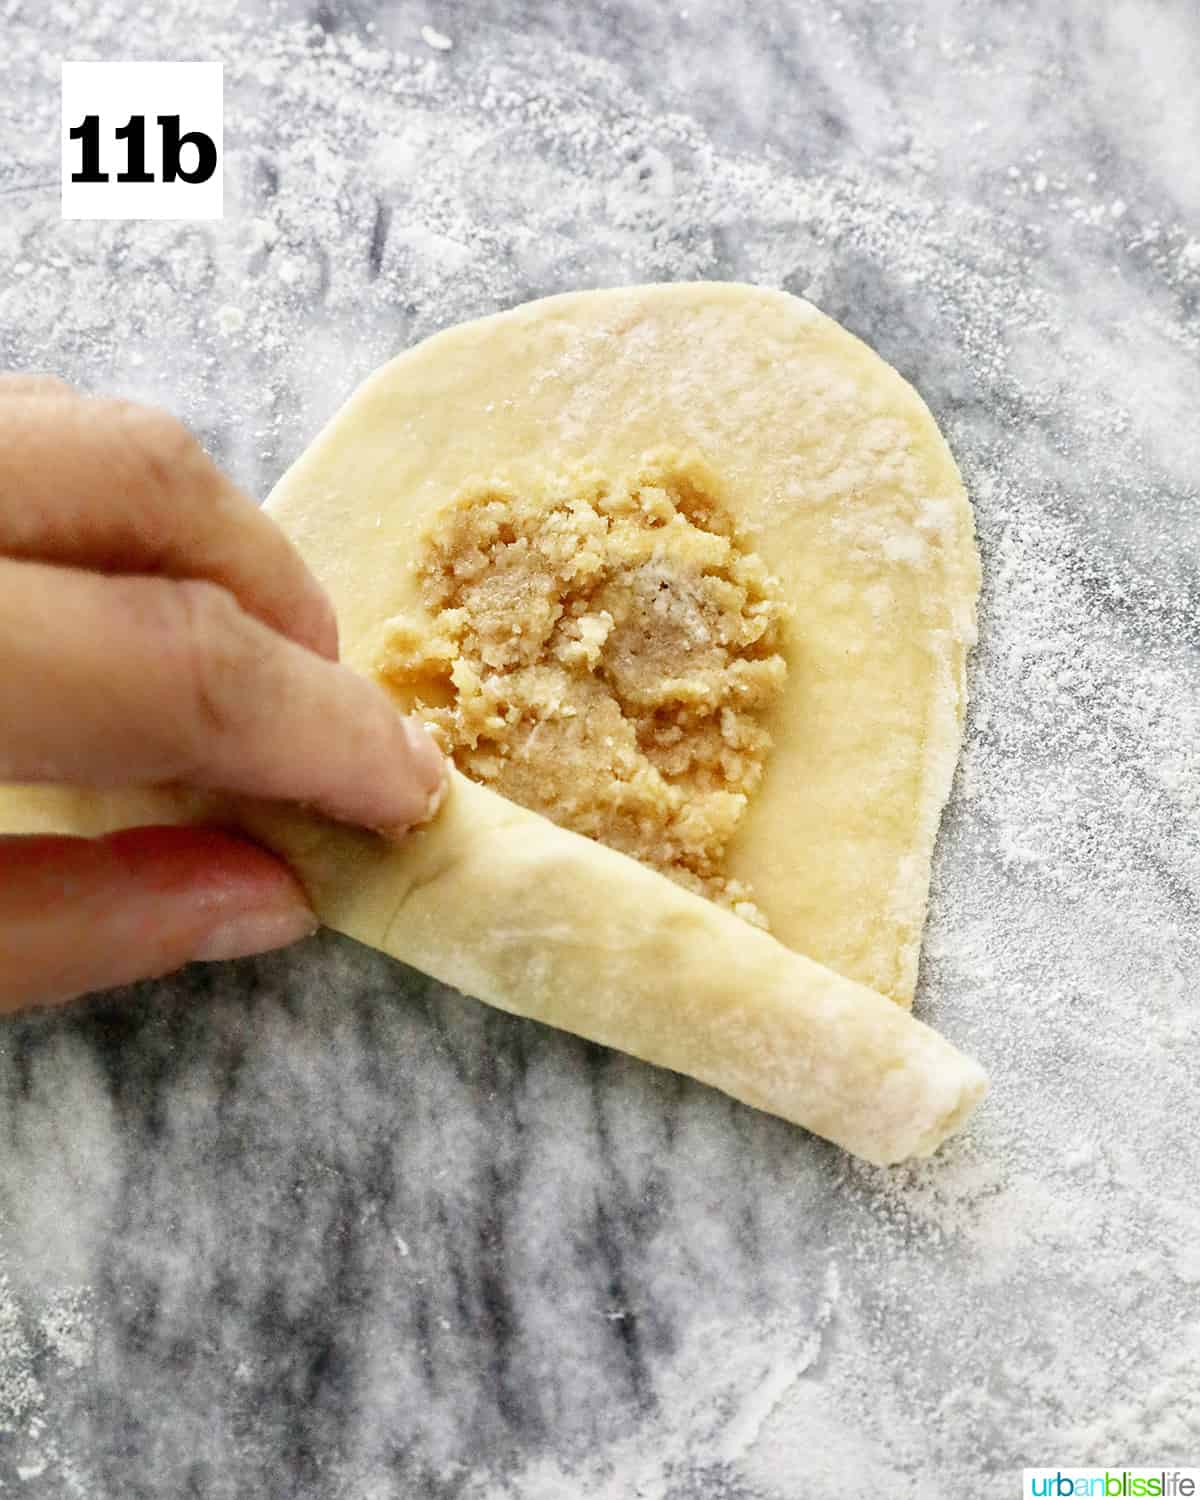
11. Place one tablespoon of filling in the center of each oval, leaving about ¼” space around the edges. Then roll them up and secure the tip by pressing gently.
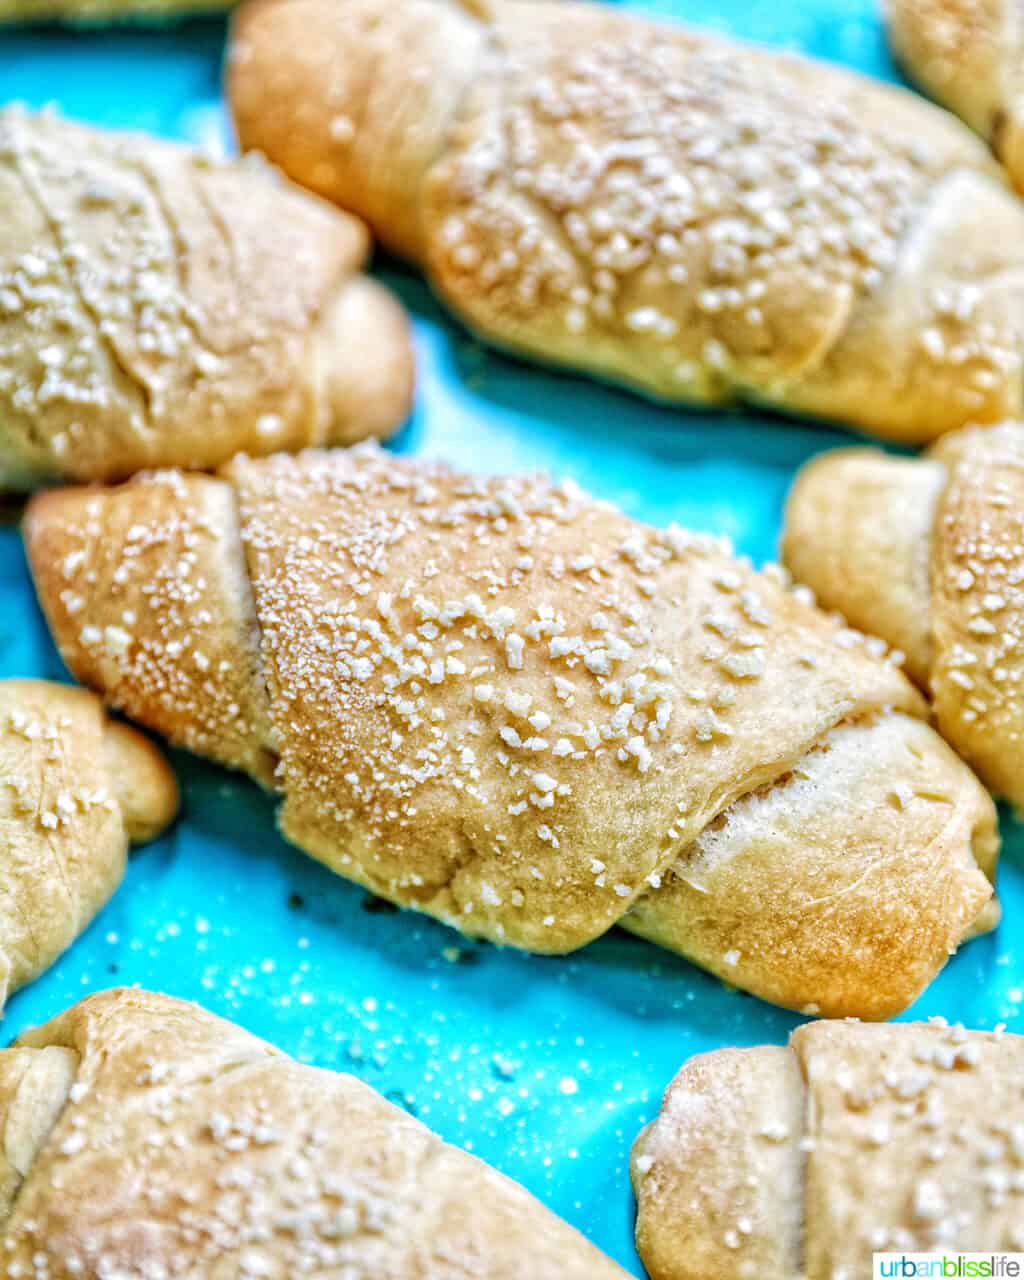
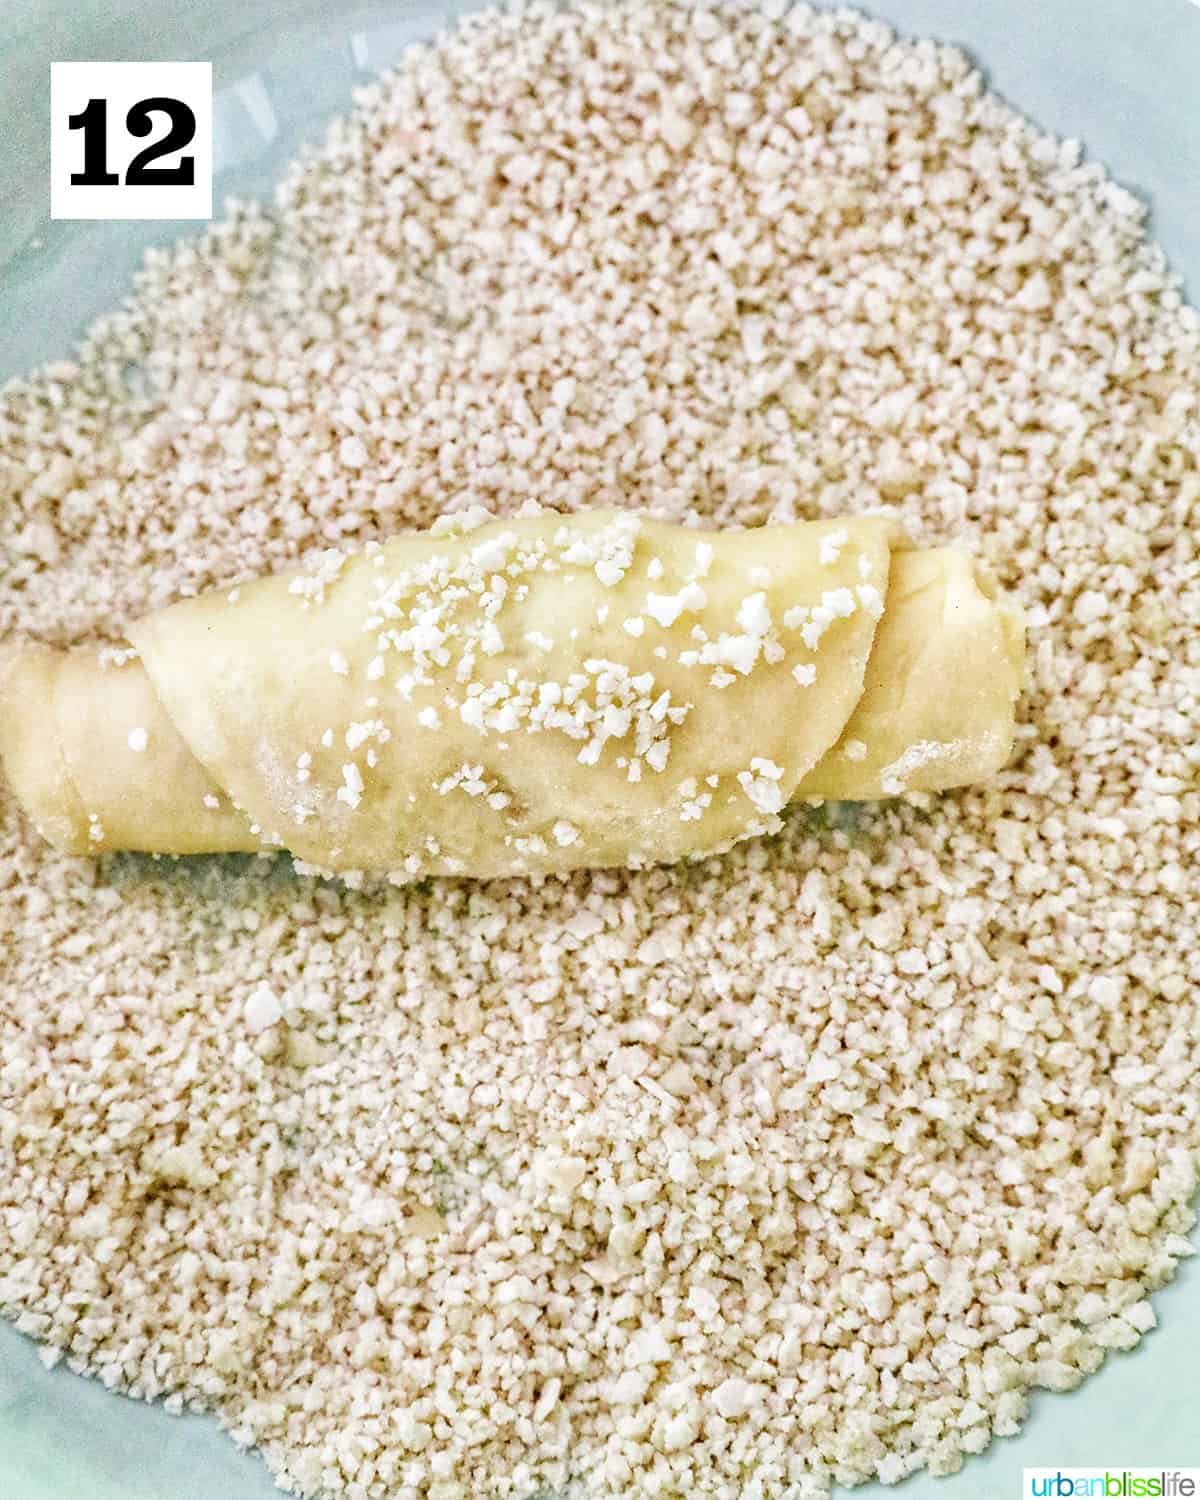
12. Gently press the top of each into the shallow bowl of breadcrumbs.
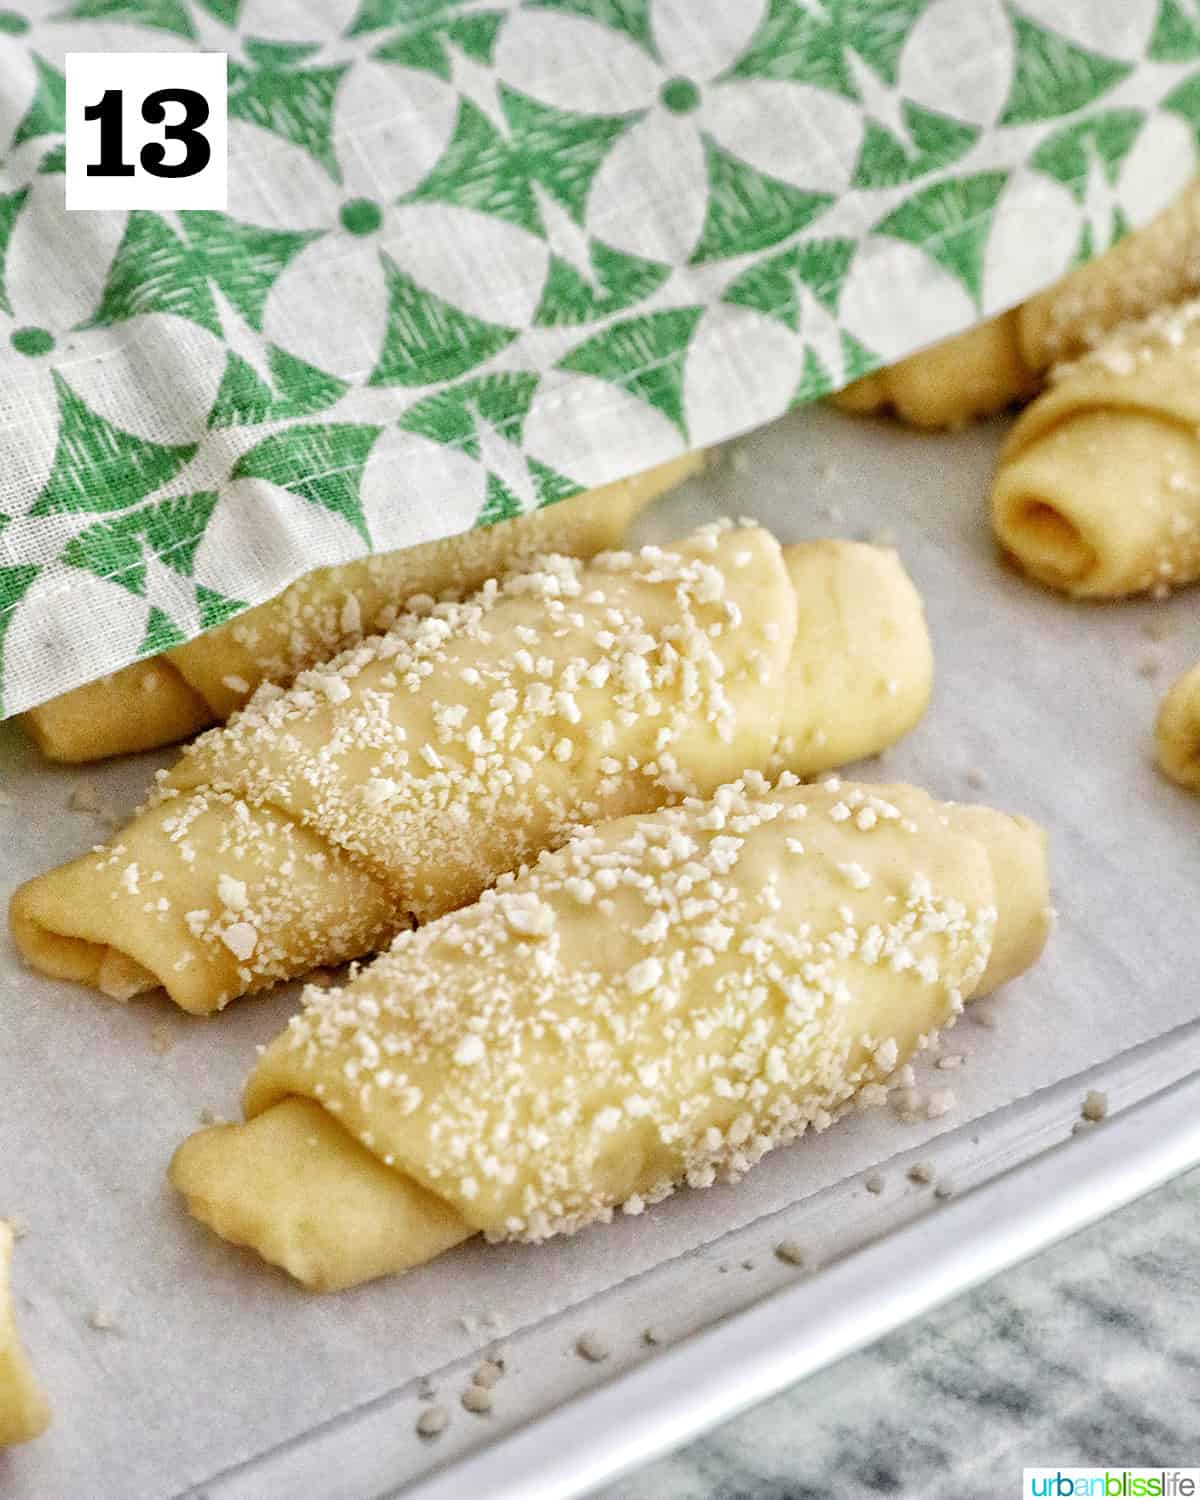
13. Cover with a damp towel and allow to rise for a second time, about 30 minutes, just until the dough has doubled in size. Meanwhile preheat the oven to 325°F and line 2 baking sheets with parchment paper.
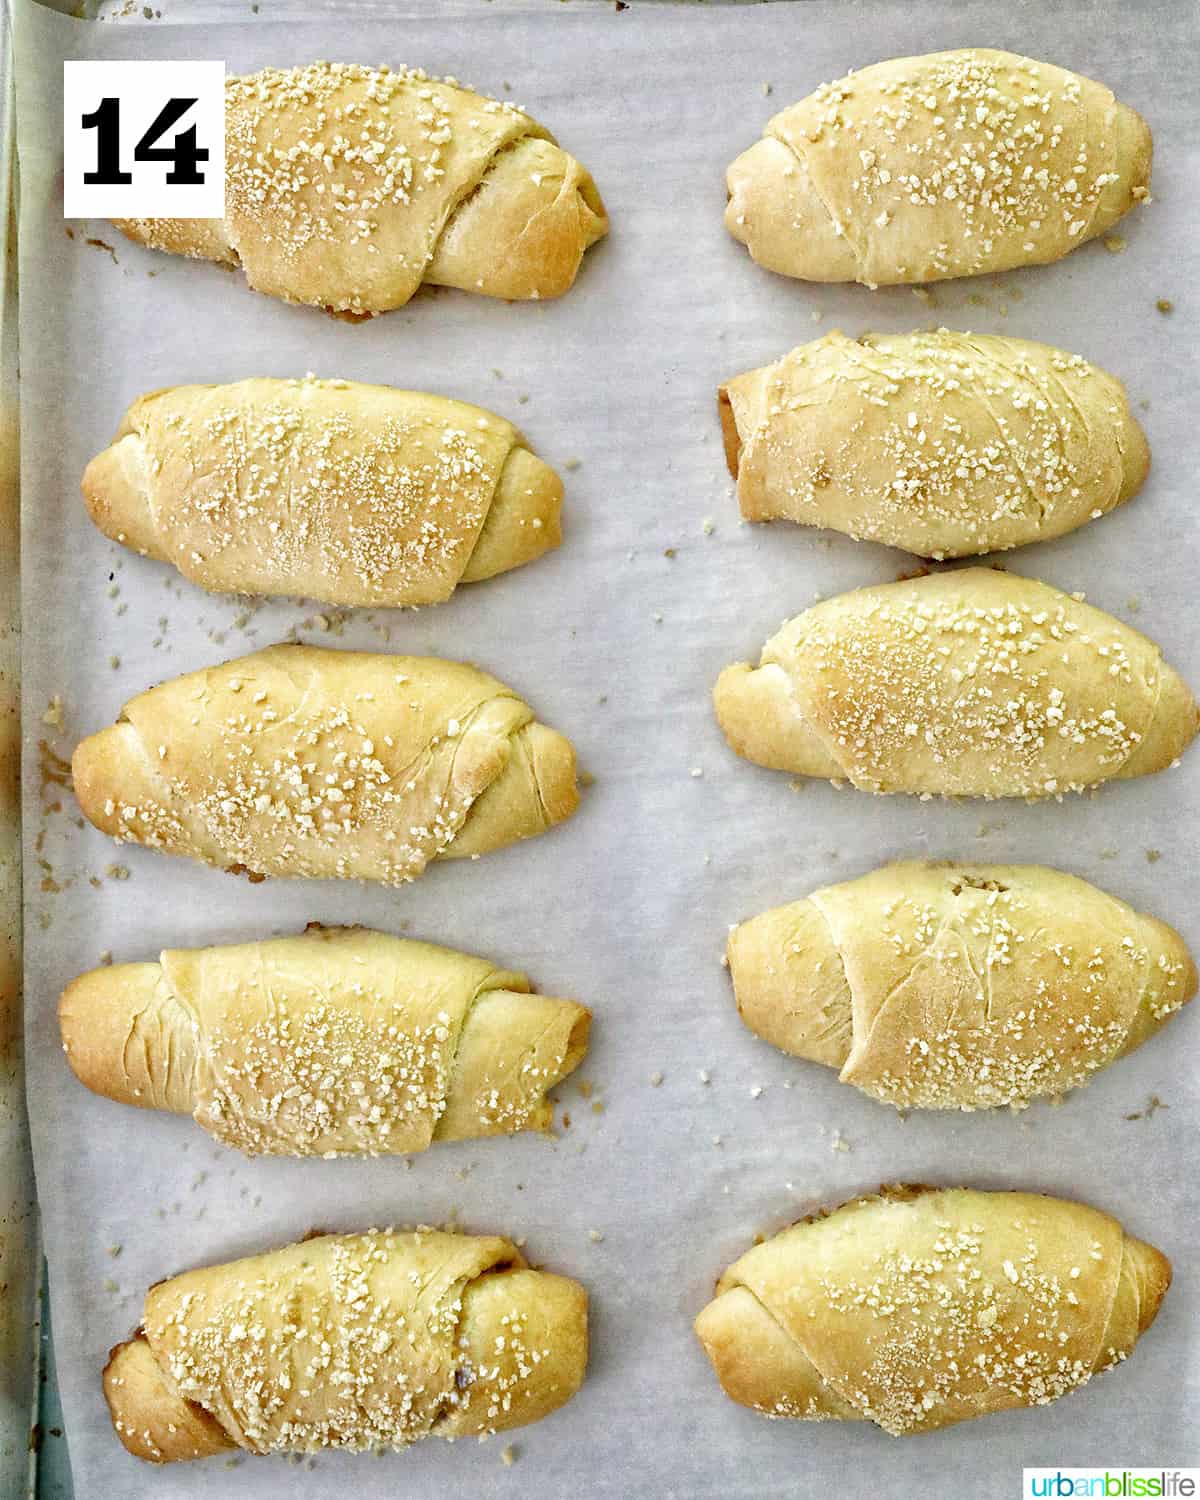
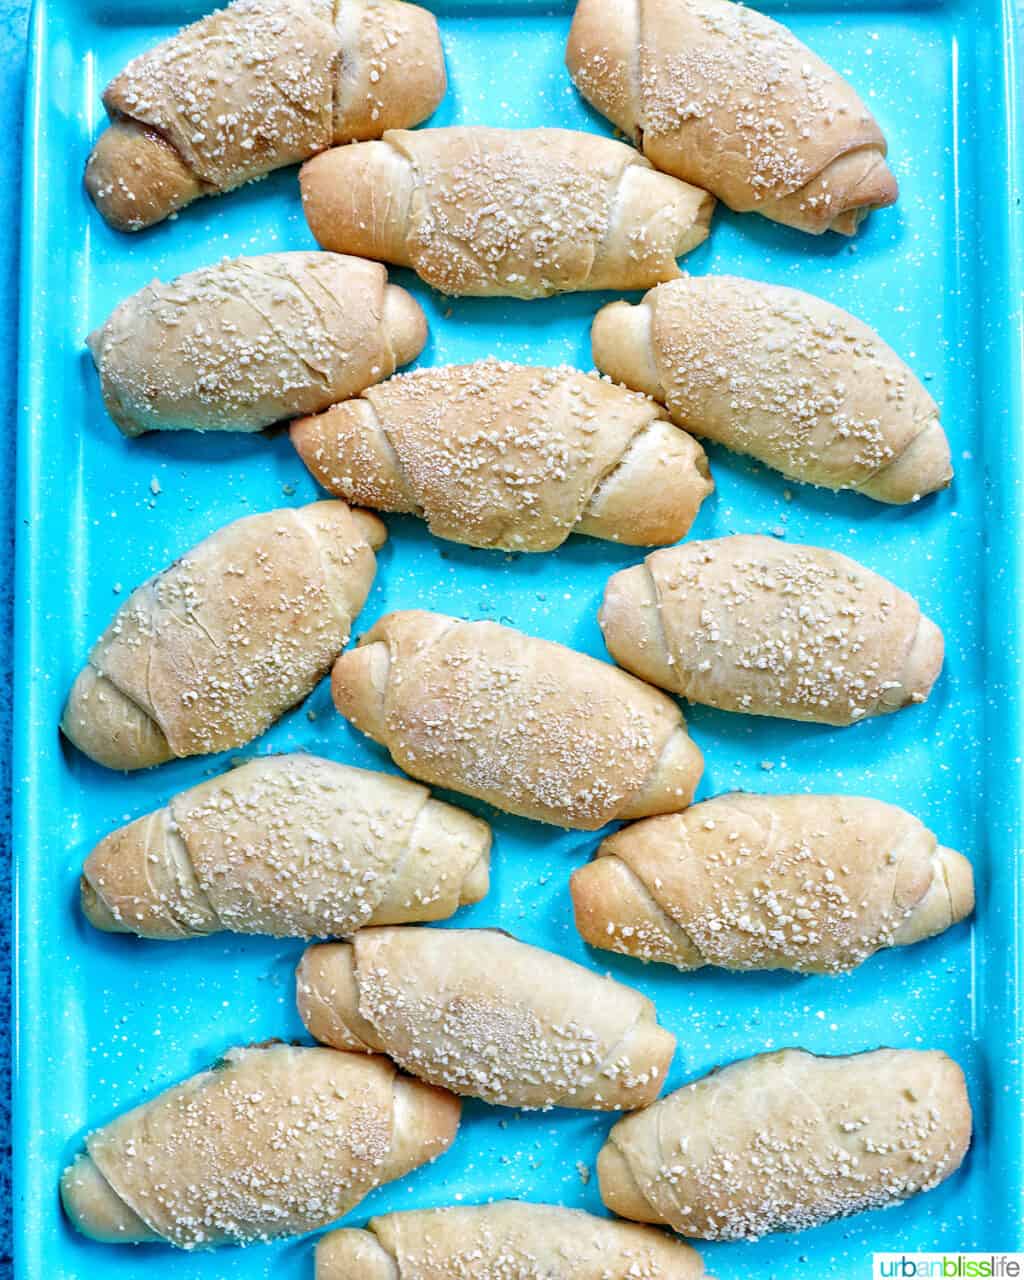
14. When the rolls have doubled in size, place them on the prepared baking sheets a couple of inches apart. Bake for 20 to 25 minutes, rotating and switching the trays halfway through for even baking. The tops should be just lightly golden brown. Allow to cool on the baking sheet for 5 minutes before serving.
🍞 Spanish bread FAQs
Many Filipino cooking and baking techniques were influenced by Spain, which ruled the Philippines for almost 400 years. This bread is golden on the outside, but soft and fluffy, and filled with a buttery, sugary filling.
There are many different ways Filipinos fill Spanish bread. This recipe calls for a classic filling of butter, vanilla, light breadcrumbs for texture, and light brown sugar.
Store Spanish bread in a bread box or other airtight container at room temperature for up to four days. You can also freeze Spanish bread in a freezer-safe container or freezer bag for up to two months.
🥘 Kitchen tools and equipment
To make this Filipino bread recipe, you just need a few basic kitchen tools:
🍽 Serving ideas
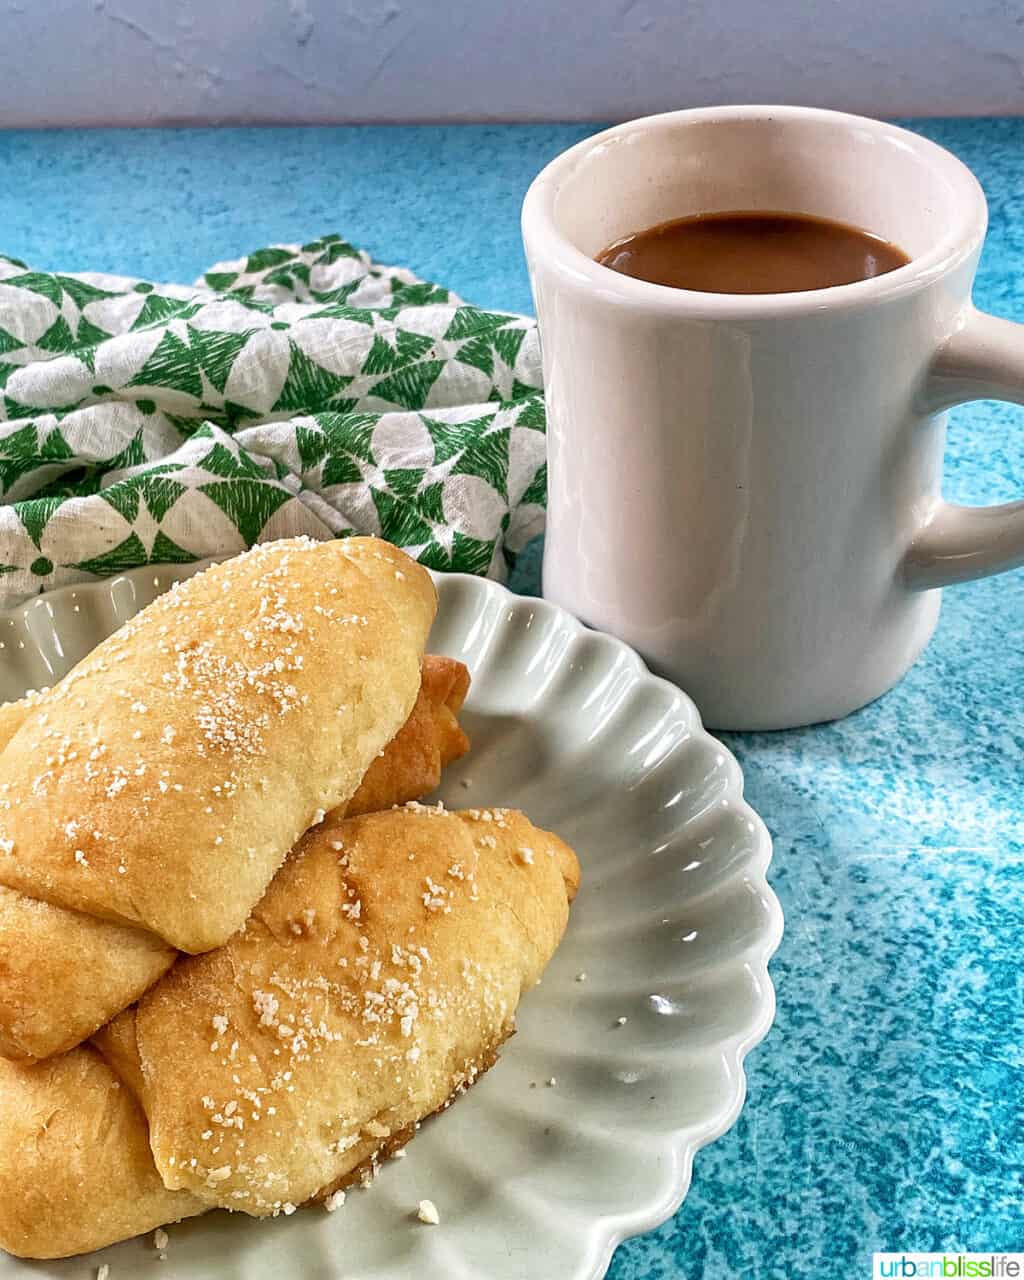
Filipino Spanish bread is delicious with a cup of coffee for a mid-morning or mid-afternoon snack.
It’s also a great side dish to serve at lunch or dinner, or at family gatherings. Serve it along with Lumpia (Filipino spring rolls), Filipino Pork BBQ Skewers, Filipino Chicken Adobo.
On chilly days when you’re craving comfort food, enjoy Spanish bread with a hot, comforting bowl of Almondigas (Filipino meatball and noodle soup) or Beef Caldereta (Filipino stew).
More Filipino recipes
For more, you can buy my Filipino cookbook: Modern Filipino Cooking, my 55-page e-Book with authentic Filipino recipes that I’ve adapted for today’s modern kitchen!
Did you make this recipe? Don’t forget to leave a 5-Star 🌟🌟🌟🌟🌟 rating in the recipe card, and if you really loved it, please leave a comment further down on the page. Thank you!
Spanish Bread
Equipment
Ingredients
Filling
- ½ cup unsalted butter, softened to room temperature
- 1 cup light brown sugar, packed
- 1 cup plain breadcrumbs, divided
- 1 teaspoon vanilla extract
Bread
- 2¼ teaspoons active dry yeast , or one package
- ½ cup warm water, 100-110°F
- ½ cup granulated sugar
- 3 egg yolks
- ¾ cup evaporated milk or heavy cream
- ½ cup unsalted butter, melted and slightly cooled
- 1 teaspoon salt
- 3 cups bread flour
- 1 cup all-purpose flour, plus more for kneading
- 1 Tablespoon olive oil
Instructions
Proof the yeast
- In a bowl or glass measuring cup, gently stir the yeast into the warm water. Let sit for 5 to 10 minutes, until the yeast almost doubles in size. Meanwhile, make the filling.
Make the filling
- In a large bowl, mix together the softened butter, light brown sugar, ½ cup breadcrumbs, and vanilla. Set aside.
Make the bread
- In a separate large bowl, whisk together the milk (or cream), granulated sugar, melted & cooled butter, egg yolks, salt, and yeast.
- Gradually whisk in the flours, alternating between the bread flour and the all-purpose flour, until the mixture forms a dough ball.
- On a lightly floured surface, knead the dough for about 10 minutes, just until the dough becomes smooth and elastic. Lightly grease the inside of a large glass bowl with olive oil or butter and place the dough in the bowl. Cover with a towel or plastic wrap and allow to rise in a dark, warm place for about an hour. The dough should be double in size.
- Return the dough to the floured surface, and divide into four even dough balls. Then gently roll each ball out to form a log, about 6" long by 2" wide.
- Use a pastry bench or pastry cutter to cut each log into 5 equal pieces and roll each into a ball (see Notes). Use a rolling pin to roll each of those pieces flat into an oval shape about 6" long by 3½" wide.
- Place one tablespoon of filling in the center of each oval, leaving about ¼" space around the edges. Then roll them up and secure the tip by pressing gently.
- Gently press the top of each into the shallow bowl of the remaining ½ cup breadcrumbs. Cover with a damp towel and allow to rise for a second time, about 30 minutes, just until the dough has doubled in size. Meanwhile preheat the oven to 325°F and line 2 baking sheets with parchment paper.
- When the rolls have doubled in size, place them on the prepared baking sheets a couple of inches apart. Bake for 20 to 25 minutes, rotating and switching the trays halfway through for even baking. The tops should be just lightly golden brown. Allow to cool on the baking sheet for 5 minutes before serving.
Video
Notes
Nutrition
Nutrition information is automatically calculated, so should only be used as an approximation.


Can you confirm that it is 1 cup of water with the yeast, as my dough was very wet, very very wet, con only see th yeast being the problem, as in your picture it looks like 1/2 cup?
Hi there! Thank you for catching that! It is 1/2 cup of warm water. I’ve tested this recipe a few times with different variations but 1/2 cup is the measurement that works best, and looks like that didn’t get updated with the last revision. Just updated it now. Thank you!
This looks amazing and such a treat! Thank you!
These are SO tasty! And they were so easy to make! Love being able to try new things like this. Thank you!
These rolls look so light and fluffy. I like that they can be a snack as I would snack on these any day. Yummy!
I LOOOOVE Spanish Bread but always assumed they’d be hard to bake. This looks so easy; I can’t wait to try it!
These turned out so sweet and fluffy! I love having one for breakfast with my tea, I’ll definitely be making them again!